Version: 0.7.x (Phase 4) Last updated: January 18, 2026
Beta Testing
While this implementation was already put into Beta phase, there are still a few things that need to be done. All things that are missing are listed as feature requests and all bugs found will also appear there. You can find everything on the AAPS_Tandem_testing repo's issues page.
If you find anything that doesn't work, please check there first. If you can't find it, post a message in our testing discord group #t_mobi-test, so that we can discuss if this is a bug or just how implementation works. If we discover something new, we will add it as bug.
The current plan is to implement as much missing functionality as possible in January, while you are all testing what we currently have.
Please read this entire documentation page before you start testing. Note that in some cases you may need to restart AAPS after you set up your pump for first time.
This documentation is mostly complete. There might be some sections missing (let us know if you think so), and any new functionalities are of course not included.
Important: Please read this documentation carefully, so that you can see how mobi works and how this driver works, which will help you also with the decision of how to set up the pump.
Table of contents
Powering on the Mobi
If you have a brand new Mobi, or need to turn it on and get it out of "deep sleep" mode:
Plug in the provided Mobi charging pad or a different Qi charging pad
Place the Mobi on the charging pad
If no lights appear, hold down the pump button for about 15 seconds until the lights begin to flash.
When the pump has turned on, it should flash red LED lights and make audible beep noises.
Connection setup
While there is an option currently to connect to the pump directly from AAPS (Option B below), I would like to remind you that the Mobi pump does not have a screen, and if something goes wrong, there are limited options for fixing the pump from within AAPS. To solve serious problems with the pump, you would either need the offical app (the "Tandem Mobi" app for iPhone, Android version expected by the end of Q1 2026) or ControlX2 in tandem to AAPS itself.
Re-pairing the Mobi pump requires a wireless charger. While testing Mobi with AAPS, you should have a wireless charger available at all times in case you need to re-pair, switch from being paired via AndroidAPS to the official Mobi app, or switch phones. You can use any Qi compatible wireless charger, you do not need to exclusively use the "official" Tandem wireless charging pad. Note that while MagSafe chargers do work, you should avoid bringing the pump cartridge area into contact with the magnets to avoid potential damage to the piston.
ControlX2 is a small, open-source Android app created by @jwoglom, one of the co-authors of this integration, which can monitor your pump, issue Bolus, TBR, and modify (nearly) all pump settings. Newer versions were extended with Mobi specific commands and requirements (change cartridge, fill cannula, etc), some of which we directly use in this driver.
Importantly, ControlX2 is designed to issue any supported command to the pump directly, with more ability to debug problems. Installing ControlX2 doesn't mean keeping both applications running (in fact, trying to use both at once will likely confuse the pump and cause disconnections), it just means that if something goes wrong, we can shutdown (force close) AAPS and then start controlX2 to troubleshoot the pump. Both apps can't run at the same time, because they both require exclusive access to the pump at this time.
Once the pump is configured and AAPS is running, the AAPS connection to the Mobi is 24/7: we never disconnect from the pump. This mirrors how the official app works and the Mobi is designed for this behavior with Bluetooth Low-Energy.
A.) Using shared connection with controlX2
If connecting with ControlX2, start by first setting it up on your device. Install the latest available release at https://github.com/jwoglom/controlX2/releases (1.0.0-20251224 at time of writing this documentation).
Install ControlX2 on the same phone where you will be using AAPS, and launch it. Grant ControlX2 the permissions it requests so that it can scan for available pumps.
The ControlX2 app should walk you through the Mobi pairing process. The pairing process is a little temperamental as it is not designed to be done very frequently - it may take several tries.
To pair the pump you need to put it on the charging pad (any Qi compatible wireless charger works), and wait for the white LED lights to pulse indicating that the pump has begun charging. If any alerts are triggering, you will see red blinking lights and need to wait until they stop before continuing.
Once the Mobi is charging, pick it up and remove it from the charger. Wait for about 2-3 seconds, and then press the pump button twice in sequence to enter pairing mode. You may have to do this slowly and very attenuated for it to take effect: wait 2-3 seconds, press for a quarter second, release, wait half a second, then press again. When you have completed the process the pump will vibrate and beep twice.
See the video below which shows an unsuccessful pair attempt where the pump does not beep or vibrate (first try), followed by a successful pair attempt where the pump beeps and vibrates (second try).
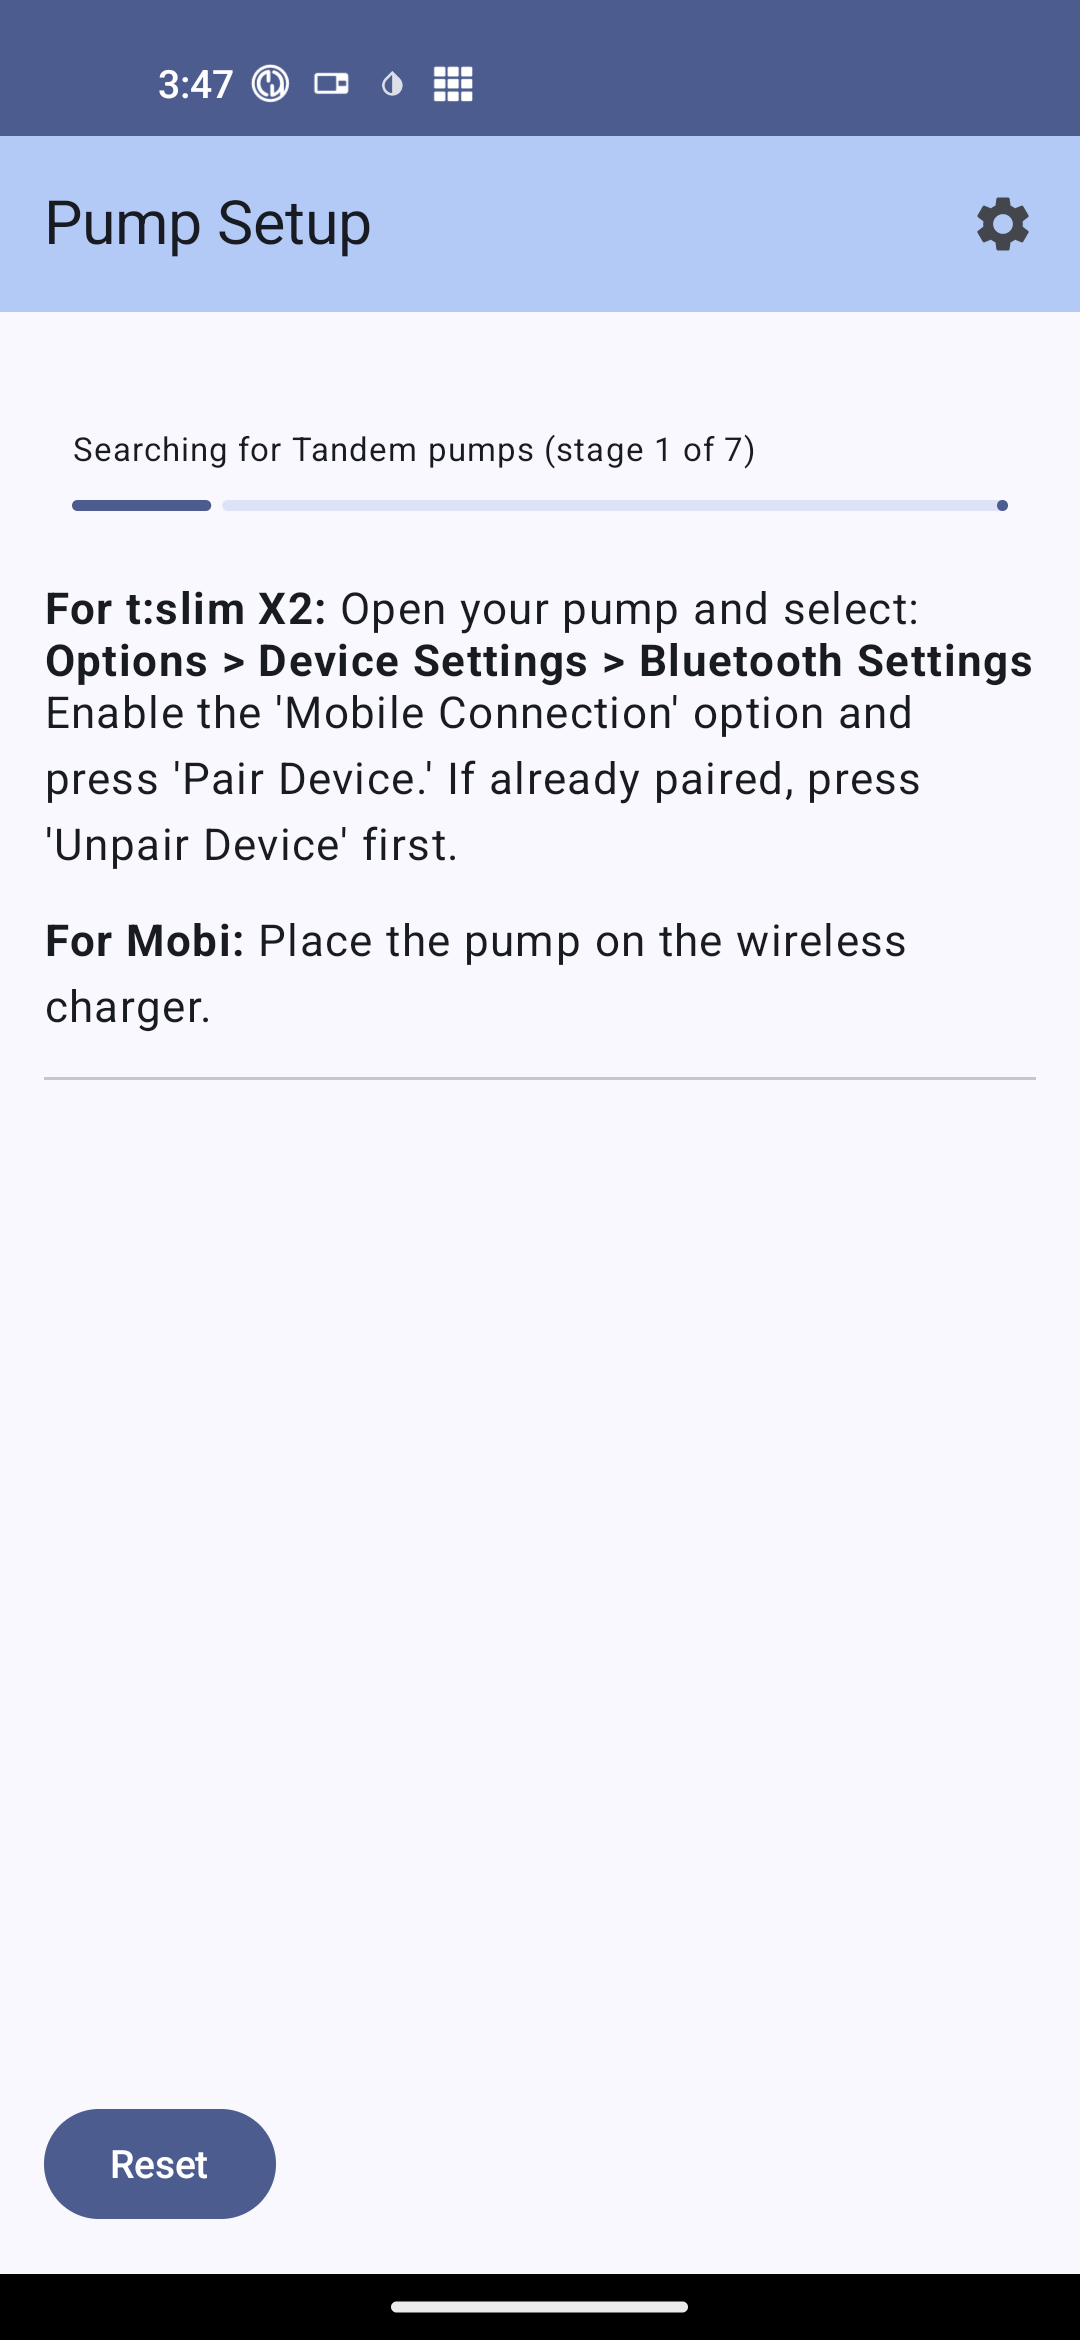
You may get stuck unable to find any pumps, on a screen like the one below:
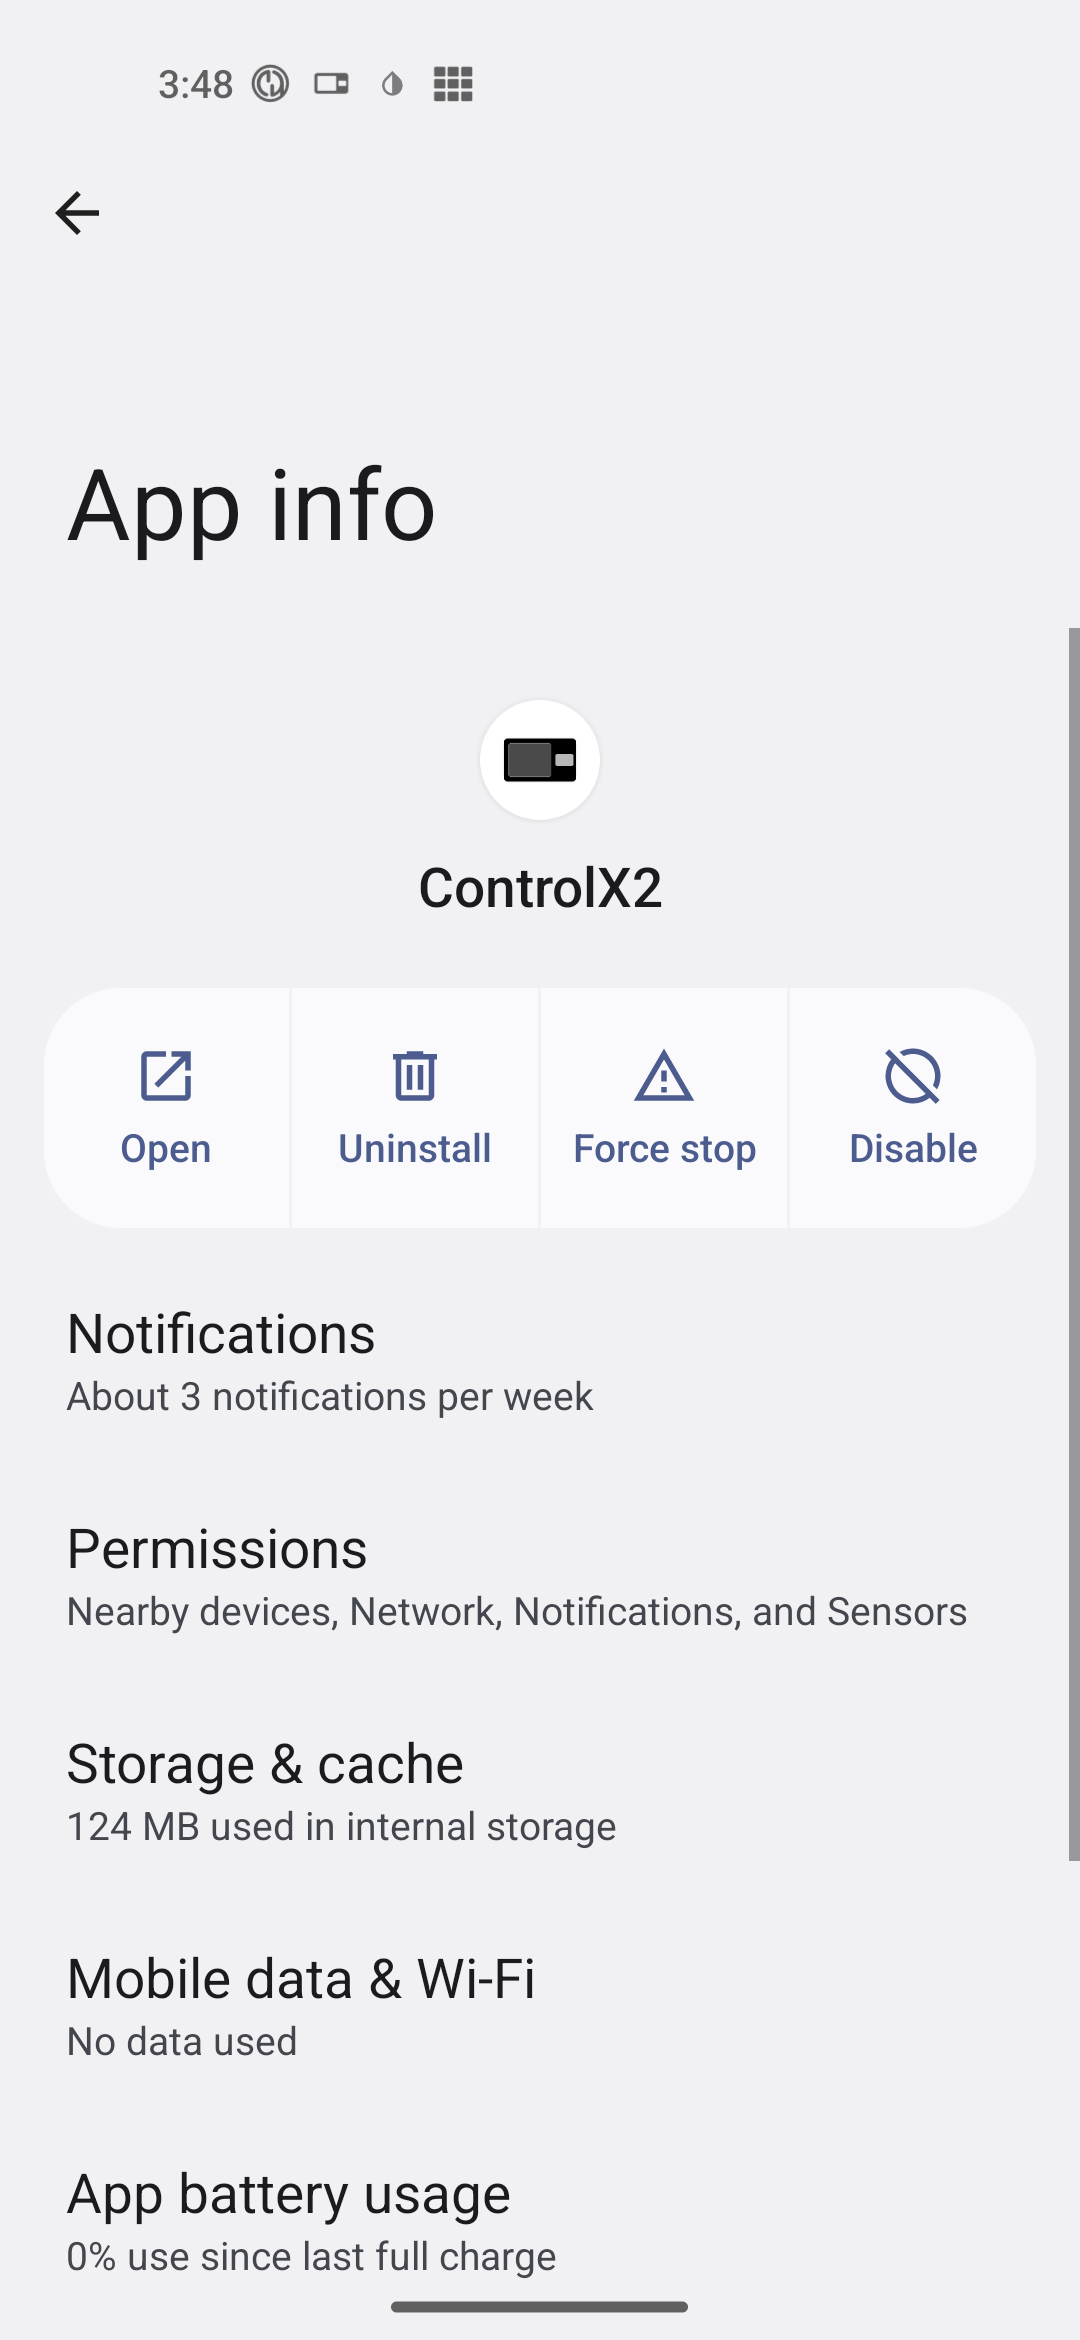
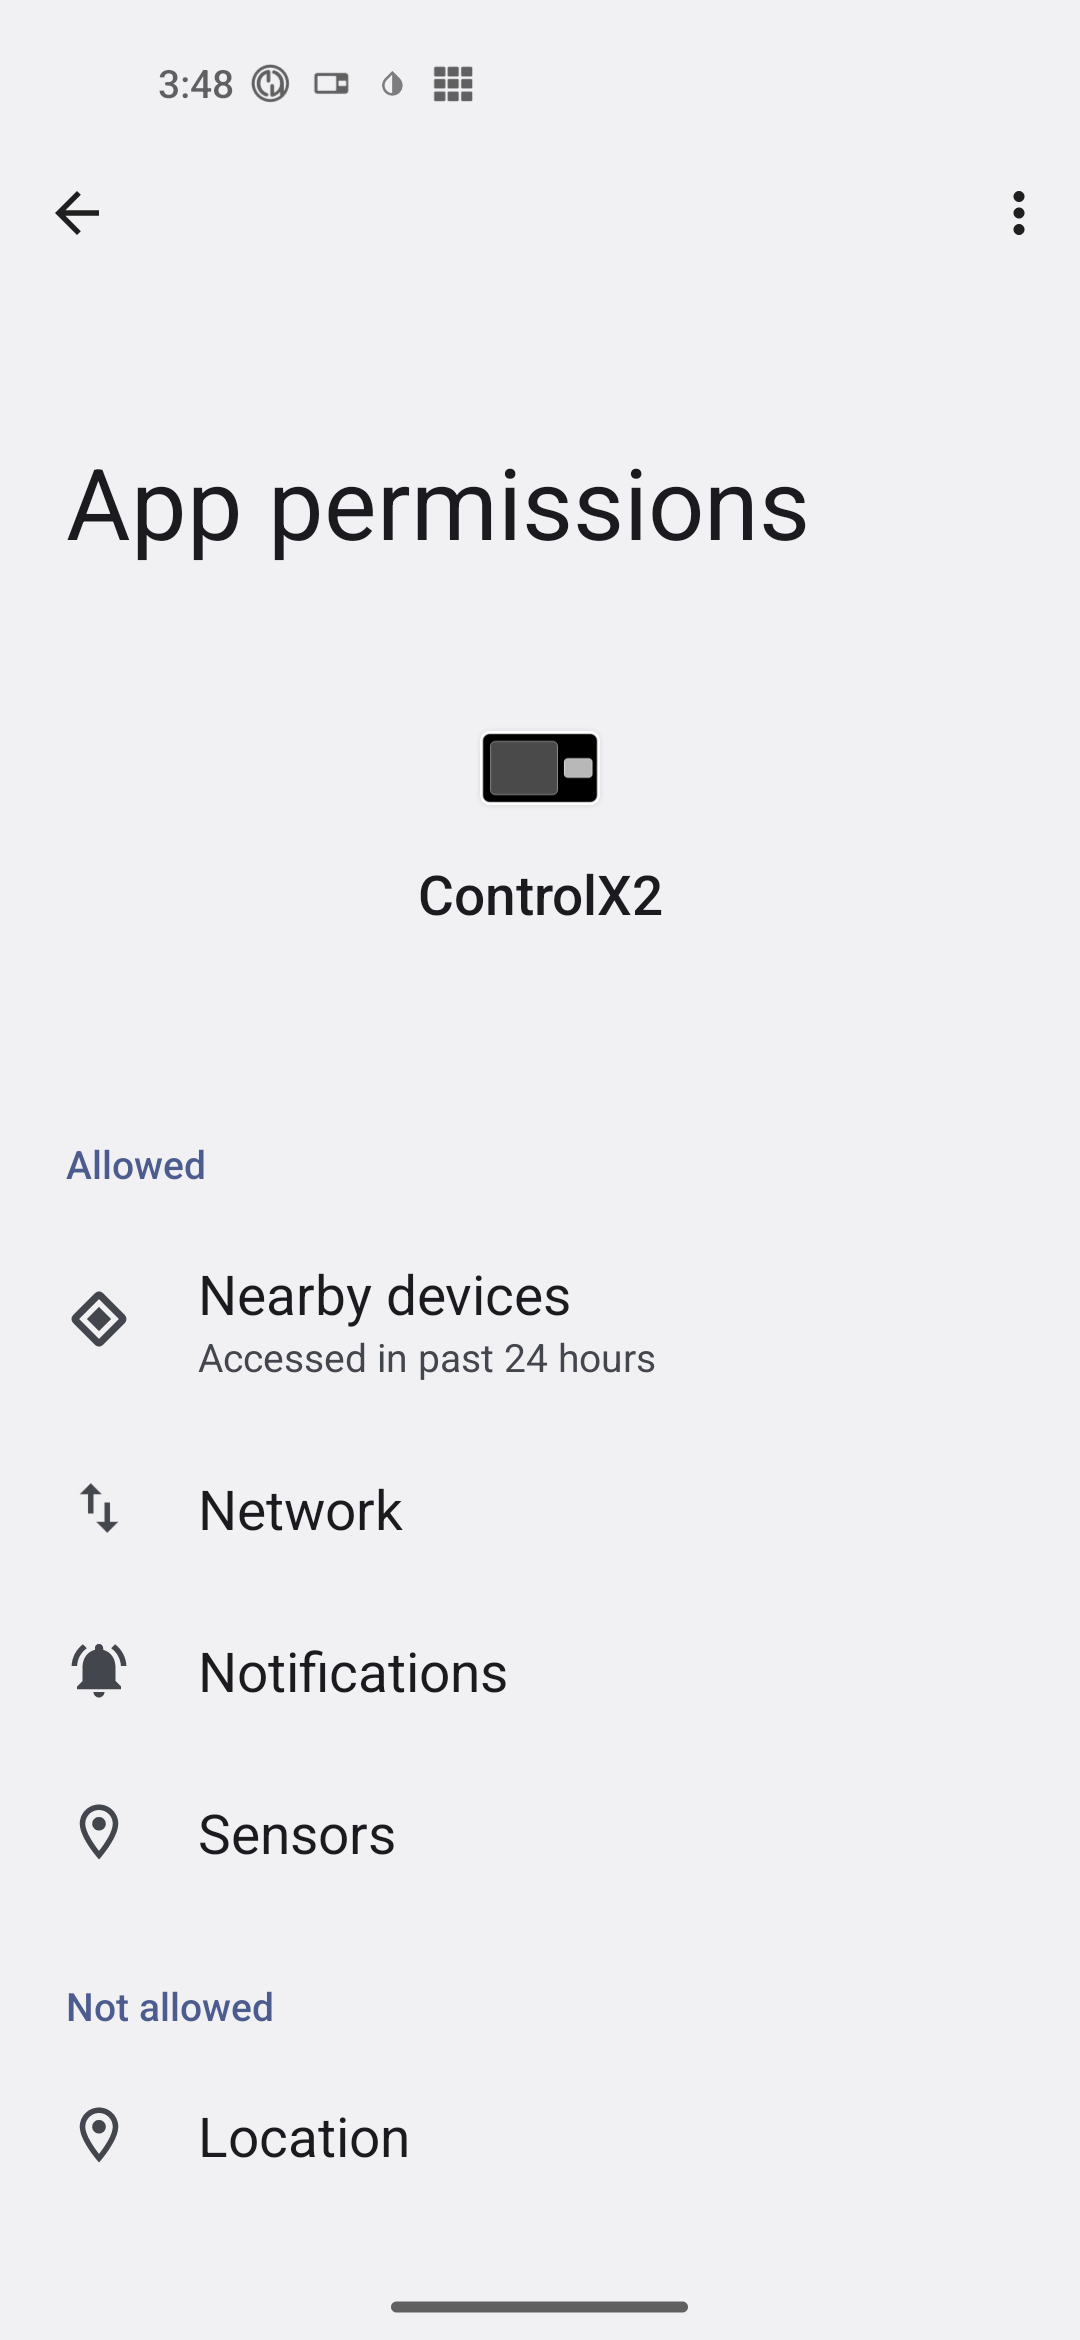
If this happens -- and you are sure that the Mobi is in pairing mode -- open the Android "App info" screen for ControlX2 and ensure that under the Permissions section, all of the listed permissions are marked under "allowed":
Some phones require the "Location" permission to be granted in order to search all Bluetooth devices. If you're having issues finding your pump, click "Location" and then grant permission either "when using the app" or "all of the time".
After your pump is succesfully communicating with ControlX2, you need to go into Setings, then Debug and then "View Pump State". There will be a JSON string with all connection data to copy. Use the option "Save to Clipboard". Force close ControlX2 and then start AAPS.
In AAPS, select Tandem Mobi as the pump and go to Configuration. Enable "Use Shared Connection", which will make "Shared Connection Data" visible. Click on that option and copy the JSON string you got from ControlX2 and exit the configuration screen. AAPS should now be able to connect to your pump. If for some reason this doesn't work immediately, "Force Close" AAPS and restart. The driver should be able to connect to the pump now.
B.) Using only AAPS
Please note that the AAPS native pairing option is a new addition to the Mobi pump driver and is not as reliable as the ControlX2 pairing mode yet.
To pair using only AAPS, select Tandem Mobi as your pump in the Config Builder or initial AAPS setup wizard.
After enabling the Mobi pump driver, force quit and re-launch AAPS or restart your phone. Then go to the "TANDEM MOBI" AAPS tab and open the "..." menu to select "Tandem Mobi Preferences" followed by "Tandem Pump Connection Wizard."
The pairing wizard should guide you through the necessary steps. See the tips listed above in case your Mobi is not detected, or see the video below.
Overview of the Tandem Mobi tab
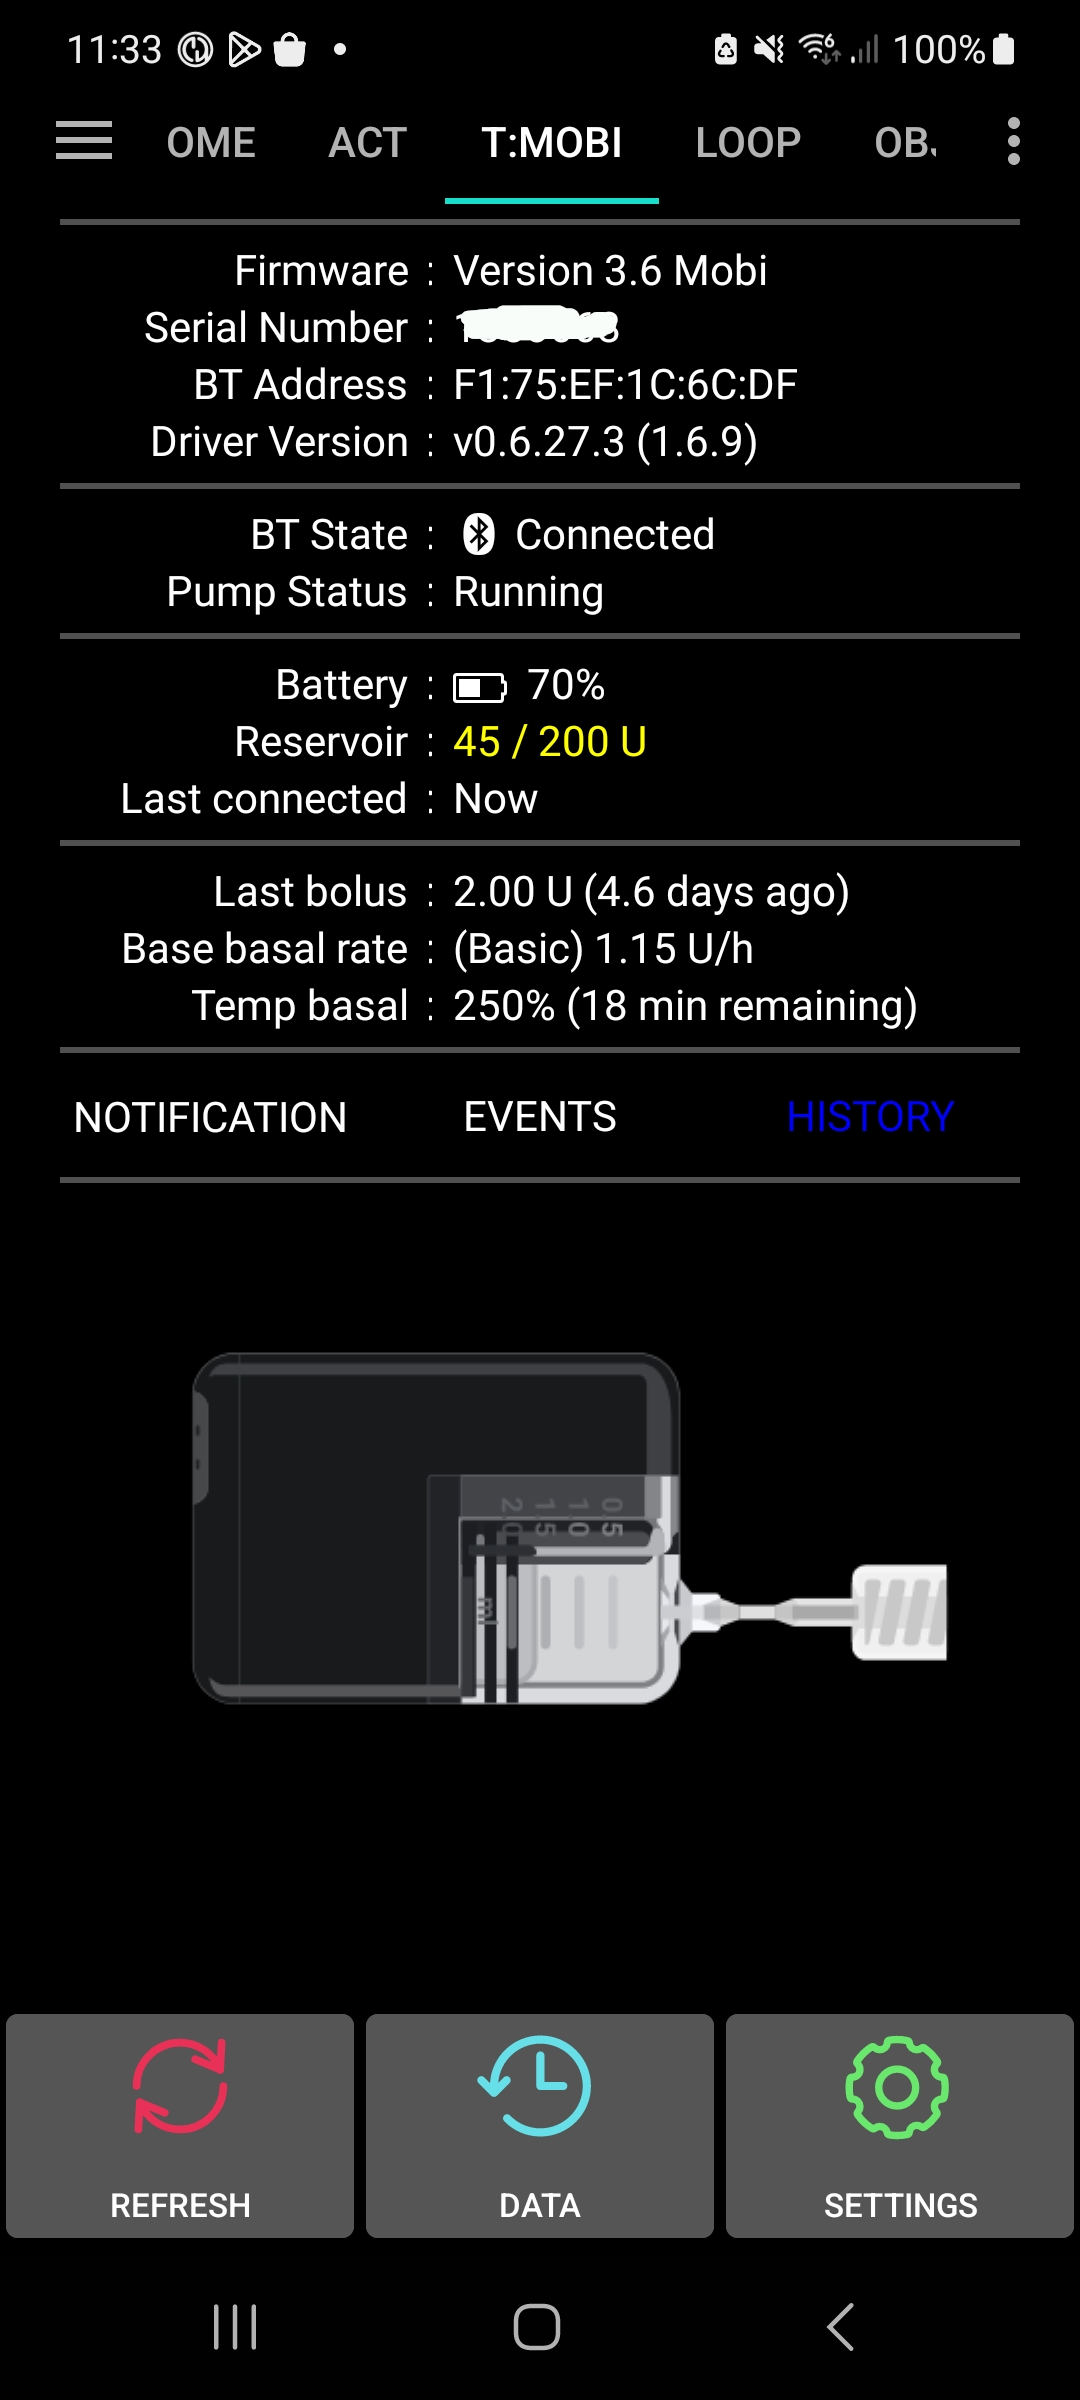
Once you have Mobi configured, the "Tandem Mobi" tab becomes available, displaying all important information. Information is divided in 6 different sections.
Section 1: Information about your pump: Firmware, Serial Number and BT address. If you have configured display of the driver version, then the version of the AAPS Mobi driver will also be displayed (when reporting bugs in the driver, this information needs to be in the report. It helps us pinpoint the problem, and we can also determine if this error was already fixed).
Section 2:: Displays the state of pump connection, this shows Connected if pump is connected, or if a command is running it will show the name of the command running as well as the Queue of commands (queue hides when empty).
Section 3: Battery status, reservoir level and when the last command was processed.
Section 4: Displays last bolus, base basal rate and if temp basal is currently running (and with what values).
Section 5: Displays driver errors (mostly this would be filled if there is problem with configuration or if for some reason we lost connection with the pump). At the moment the driver is unable to reconnect automatically with pump in all circumstances (auto reconnect will be added in Phase 3). If you loose connection with the pump, please restart AAPS (with Force Stop). If there are no errors, this section is not visible. TODO
Section 6: Indicator for Pump Data Status. This shows 3 labels:
NOTIFICATION - displays pump notifications sent from the pump (e.g. low insulin, cartridge errors, etc)
EVENTS - displays events which have occurred as tracked by AAPS
HISTORY - displays all commands sent to the pump from AAPS
If these options are in a natural color (depending on theme) then there is nothing to see, but if colors are present, that indicates there are new items available for display (red for new notifications, green for new events and blue for new history items).
The notification indicator is especially important when setting up a pump for the first time, or changing the cartridge. The Mobi will reject attempts to change cartridge or fill tubing when you have not acknowledged notifications about insulin being suspended.
Lower sections:You can see picture of the Mobi, and under it there are 3 buttons. These are described in the "Actions (buttons on lower part of overview)" section.
Configuration options
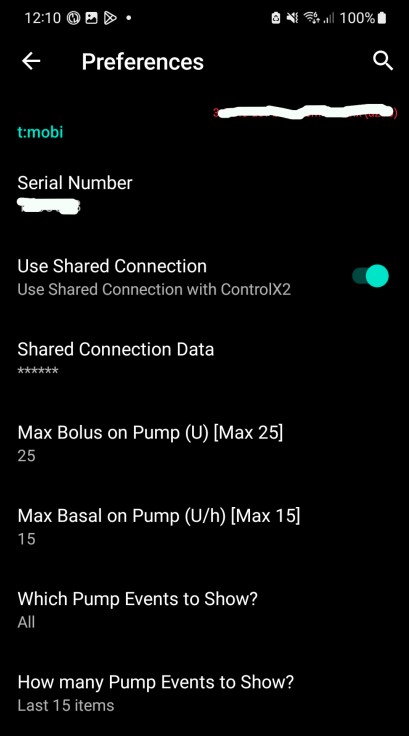
Use Shared connection: See the previous section (Connection setup) how this works. But in short, we can either use shared connection for which we also need to populate Shared connection data, or we can use just AAPS connection, for which we need to click
on Tandem Pump Pairing which will lead us through the pairing process. Options become visible depending on which is selected.
Max Bolus on Pump: This sets the maximum unit amount which can be used when giving a bolus. This is not limited to the current hour, it is just the max amount you can send at once in a single request. The value should be beween 1 and 25 units. (If you need bigger dose, you can just dose twice, waiting until the first dose is finished to perform the second dose.)
Max Basal on Pump: This sets the max amount of basal insulin the pump can be configured to deliver in a hour. Valid values are 1u/hr to 15u/hr. You can go with the max value here, but if you want to limit this the formula is to look at your highest hourly basal value multiplied by 2.5 (250% is the max TBR possible supported on Mobi pumps. For instance, if your base basal rate is 1u/hr, the pump will NOT allow temp rates above 2.5u/hr).
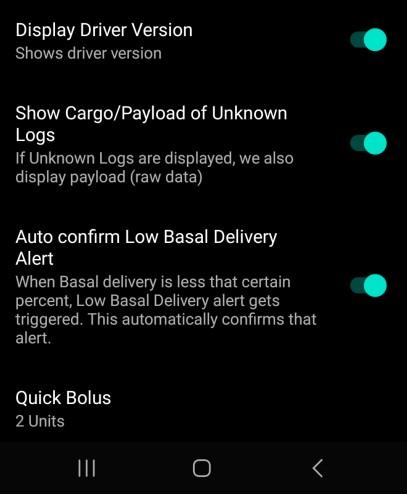
Display driver version: Displays the driver version on Mobi tab (in Section 1, 4th line if enabled - see Overview for more info)
Which Pump Events to Show? We can either show all events, or just that ones that are AAPS Relevant. Note that some Tandem reported events are of minimal relevance to AAPS.
How many Pump Events to Show? We can limit how many Pump Events will be shown (15 items, Last 3/6/12/24 hours)
Show Cargo/Payload of Unknown Logs If we select display of Unknown Logs, we can either display cargo/payload of Log entry, or not (cargo would be only in hexidecimal form of each bit displayed).
Auto confirm Low Basal Delivery Alert If low basal value is delivered (less than 50% ??), the pump gives us a special alert. If enabled, such Alarms are automatically confirmed.
Quick Bolus The button on the pump can be configured to deliver Quick boluses. This option configures how much bolus can be delivered per press (0.5U, 1U, 2U, 5U, or cover for 2g, 5g, 10g, 15g of carbs). For example, if you configure this as 0.5U, then when triggering a quick bolus by holding down the pump button until it vibrates or beeps, each button press will increment the bolus amount by 0.5U (e.g., pressing 4 times will deliver 2U). You need to confirm the quick bolus by holding down the pump button a second time after the pump confirms the amount with the same number of beeps or vibrations.
Details how driver and mobi work
Mobi-specific limitations (Please Read)
A current limitation which testers of Mobi in AndroidAPS should be aware of is that we are unable to make the pump fully silent while DIY looping.
The pump itself will either beep -- at low, medium, or high volume -- or vibrate depending on your settings when AAPS sends a Temp Basal or Bolus to the pump.
At this time, there is no known technical workaround to this problem.
Regardless of whether or not you use Control-IQ on a Mobi (Tandem's native closed loop solution), the pump still beeps or vibrates when you, the user, set a temp rate or bolus on the pump from your phone.
But the Control-IQ algorithm itself lives on the pump and not your phone, and thus makes no sounds/vibrations at all when it performs basal adjustments and boluses.
AndroidAPS (and, in the future, potential Loop/Trio iOS integrations for Mobi) experiences the problem of making sounds/vibrations because as far as the pump is concerned, it's a human making all of the temp basal and bolus actions, not the in built algorithm.
We are hopeful that in the future, Tandem will allow more fine-grained control of the sound and vibrate settings on the pump which allow DIY looping to function silently.
However we are at the mercy of Tandem releasing a firmware update for the Mobi which allows a "silent mode" or turning the volume/vibration intensity even lower or off entirely.
There is no software solution to this problem at this time -- thank you for your understanding.
In the meantime, use either ControlX2 or the official Mobi app to control the "General" sound setting which will control the sound or vibrate used for temp basals and boluses.
Startup sequence
Every time you run AAPS and the driver connects to the pump, there will be a sequence of commands executed which will retrive initial data and see if your pump is running ok and what state it is in. This process can take up to 2 minutes, depending on how fast your phone is, how good the BT connection is and if this is one of your first times running the driver. On each start the driver also checks if you have enabled Control-IQ (aka, the built in partial-closed-loop algorithm on the Tandem Mobi) and disables it as a safety measure. For safety reasons Control-IQ and AAPS should not run at the same time. To switch back to Control-IQ, disable AndroidAPS and use the ControlX2 app to re-enable Control-IQ.
List of commands that will be executed is:
Check if pump time is correct, if not set it
Get any running Alarms or Alerts
Get Status of the pump (running, suspended)
Get History (for first day or so running, 1000 of history items will be retrieved on startup and every 5 minutes on regular status check, afterwards only new history is retrieved), see History section for more info
Get Remaining insulin info
Get Battery Level
Get All Configurations and check everything is set correctly on the pump, if not settings on pump are updated (
Get Last Bolus
Get Basal Profile
During the startup sequence, the buttons in the UI are disabled.
(Pump) Notifications
Terminology notes: notifications refer to any of these four types of messages. To view a list of which types of notifications correspond to each category, click the referenced link to view the enum values in source control:
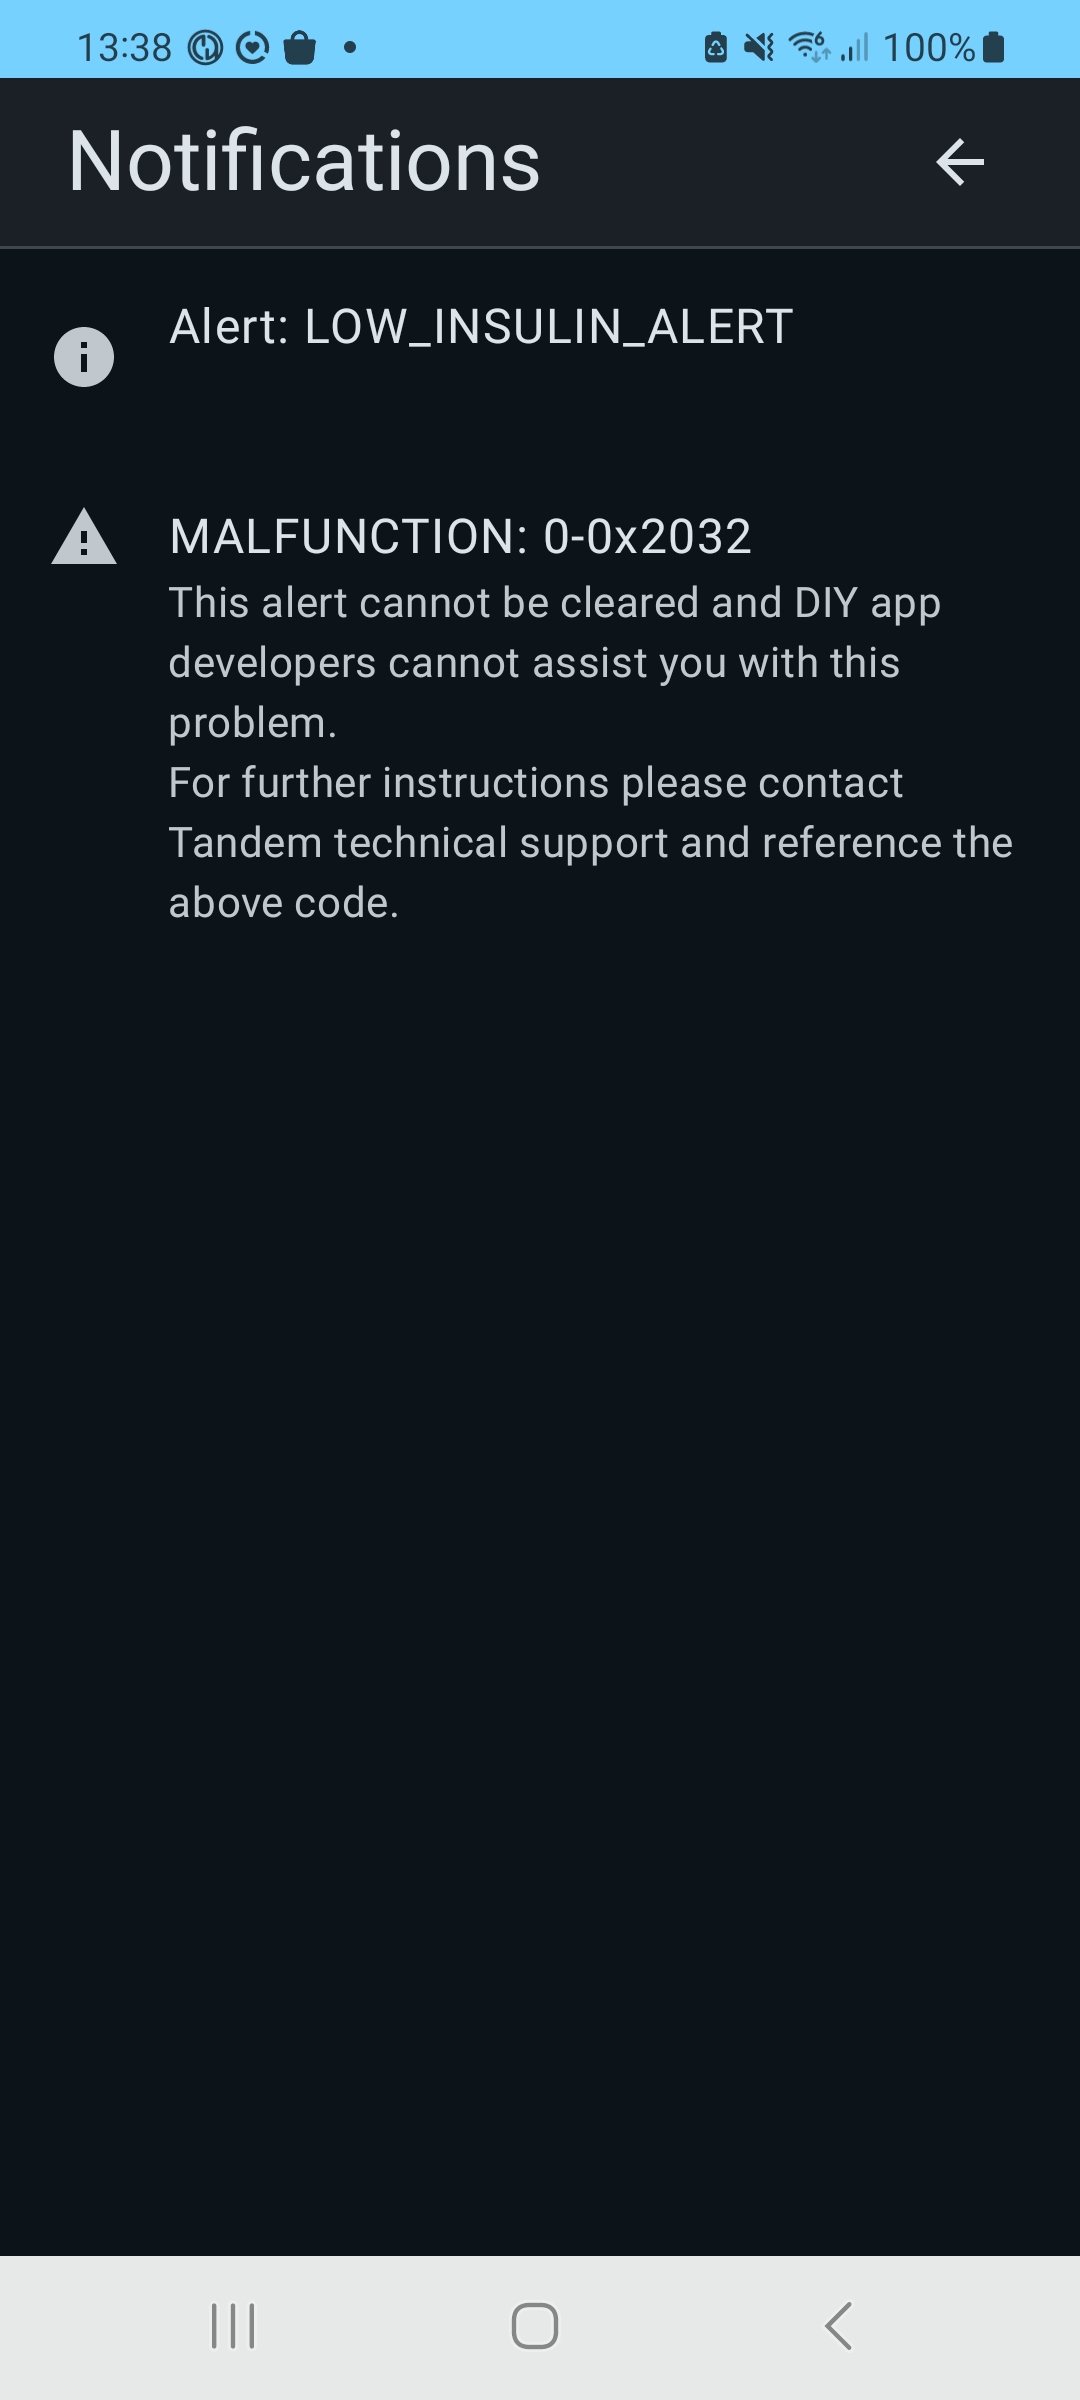
Malfunctions (most severe) - Some correspond directly with an alarm, but most are undocumented. The most severe malfunctions require you to either reset your pump or get it replaced by Tandem (e.g., hardware failure). NOTE: The PumpX2 library currently displays some malfunction codes which the official Tandem Mobi app does not display as malfunctions. Some malfunctions may disappear when acknowledging related alarms which appear in the Notifications view. Please don't contact Tandem about malfunction codes which display in AndroidAPS at this time due to this issue.
Most notifications result in some kind of event being created. In the pump communication protocol, an event is a generic way for the pump to tell the connected phone that something happened requiring it to request more information and potentially alert the user. For the most part, you can think of notifications, events, alarms, and alerts as the same thing.
Since the pump doesn't have a screen, it must show notifications differently. This is done through beeps and/or vibrations and blinking of lights beside the button. When notifications occur, the pump also sends alarms or alerts over Bluetooth to ControlX2 or AndroidAPS, and in some cases an "event" is created. The driver reads this information explicitly every 5 minutes and if there are any notifications, the indicator is colored on the driver UI (see Overview section). In most situations the pump will also send an event that a notification occurred over the Bluetooth connection, and the pump driver will automatically request the relevant information about the event without needing to wait for the 5 minute cadence.
When notifications or events occur, you can click the Data button and then select the Notifications option, OR click the Notifications text above the pump icon, which will display all notifications. If you press on a notification which is listed, it will be dismissed on the pump, and the pump will stop beeping/vibrating every few minutes.
Most of the notifications (alerts) are just of informational value, but Alarms and some other notifications will prevent pump commands. So for example if you are in Alarm state (and you don't confirm the Alarm), you won't be able to Stop/Start the pump or do any Cannula/Reservoir actions. So confirming notifications is an important step. Note that these alarms are not only for unintended problems, but also for things like notifying the user that insulin delivery has been disabled for a long time.
To view the types of alerts and alarms which can be triggered, see the linked documentation above.
Events
AAPS is connected to the pump 24/7. The main reason for this are events (which are at this moment not always working correctly, but issue is being investigated - on pumpX2 library level), which give real-time warnings, notifications and information from the pump. Events just serve as a way to tell the connected phone that it should trigger requests for more information from the pump for which the user may need to be notified.
Refresh data in driver
To keep the driver working correctly, we have to refresh data regularly, aka refresh opereations.
Pump Status, Alerts, Alarms, History - This is refreshed every 5 minutes
Remaining insulin - Refreshed every hour (when over 50%), every half hour (when over 20%) or every 15 minutes when lower than 20%.
Battery Level - Refreshed every hour (when over 30%), every half hour (when over 20%) or every 15 minutes when lower than 20%.
Note that when events sent from the pump to the phone (rather than us requesting information on a regular cadence) are working correctly, we will be able to fetch this information more regularly when the pump tells us that, e.g., the insulin or battery level has decreased.
Bolus
The Mobi driver supports both standard and SMB bolus types. When a bolus is running you will see a dialog, but please note that progress of delivery is just an estimate (Mobi delivery doesn't track how much of bolus was actualy delivered, we estimate the value with amount of time bolus was delivering), which means that the bolus might finish before the progress bar reached the end, or end may be reached and the bolus is still delivering. The underlying PumpX2 library gives some semantics for which we can detect when a bolus has finished, but this isn't fully implemented in AndroidAPS yet.
Actions (buttons on lower part of overview)
Refresh button
Refresh button triggers a forced refresh of all the data (it would be the same data retrieval which occurs when we start AAPS)
Data button
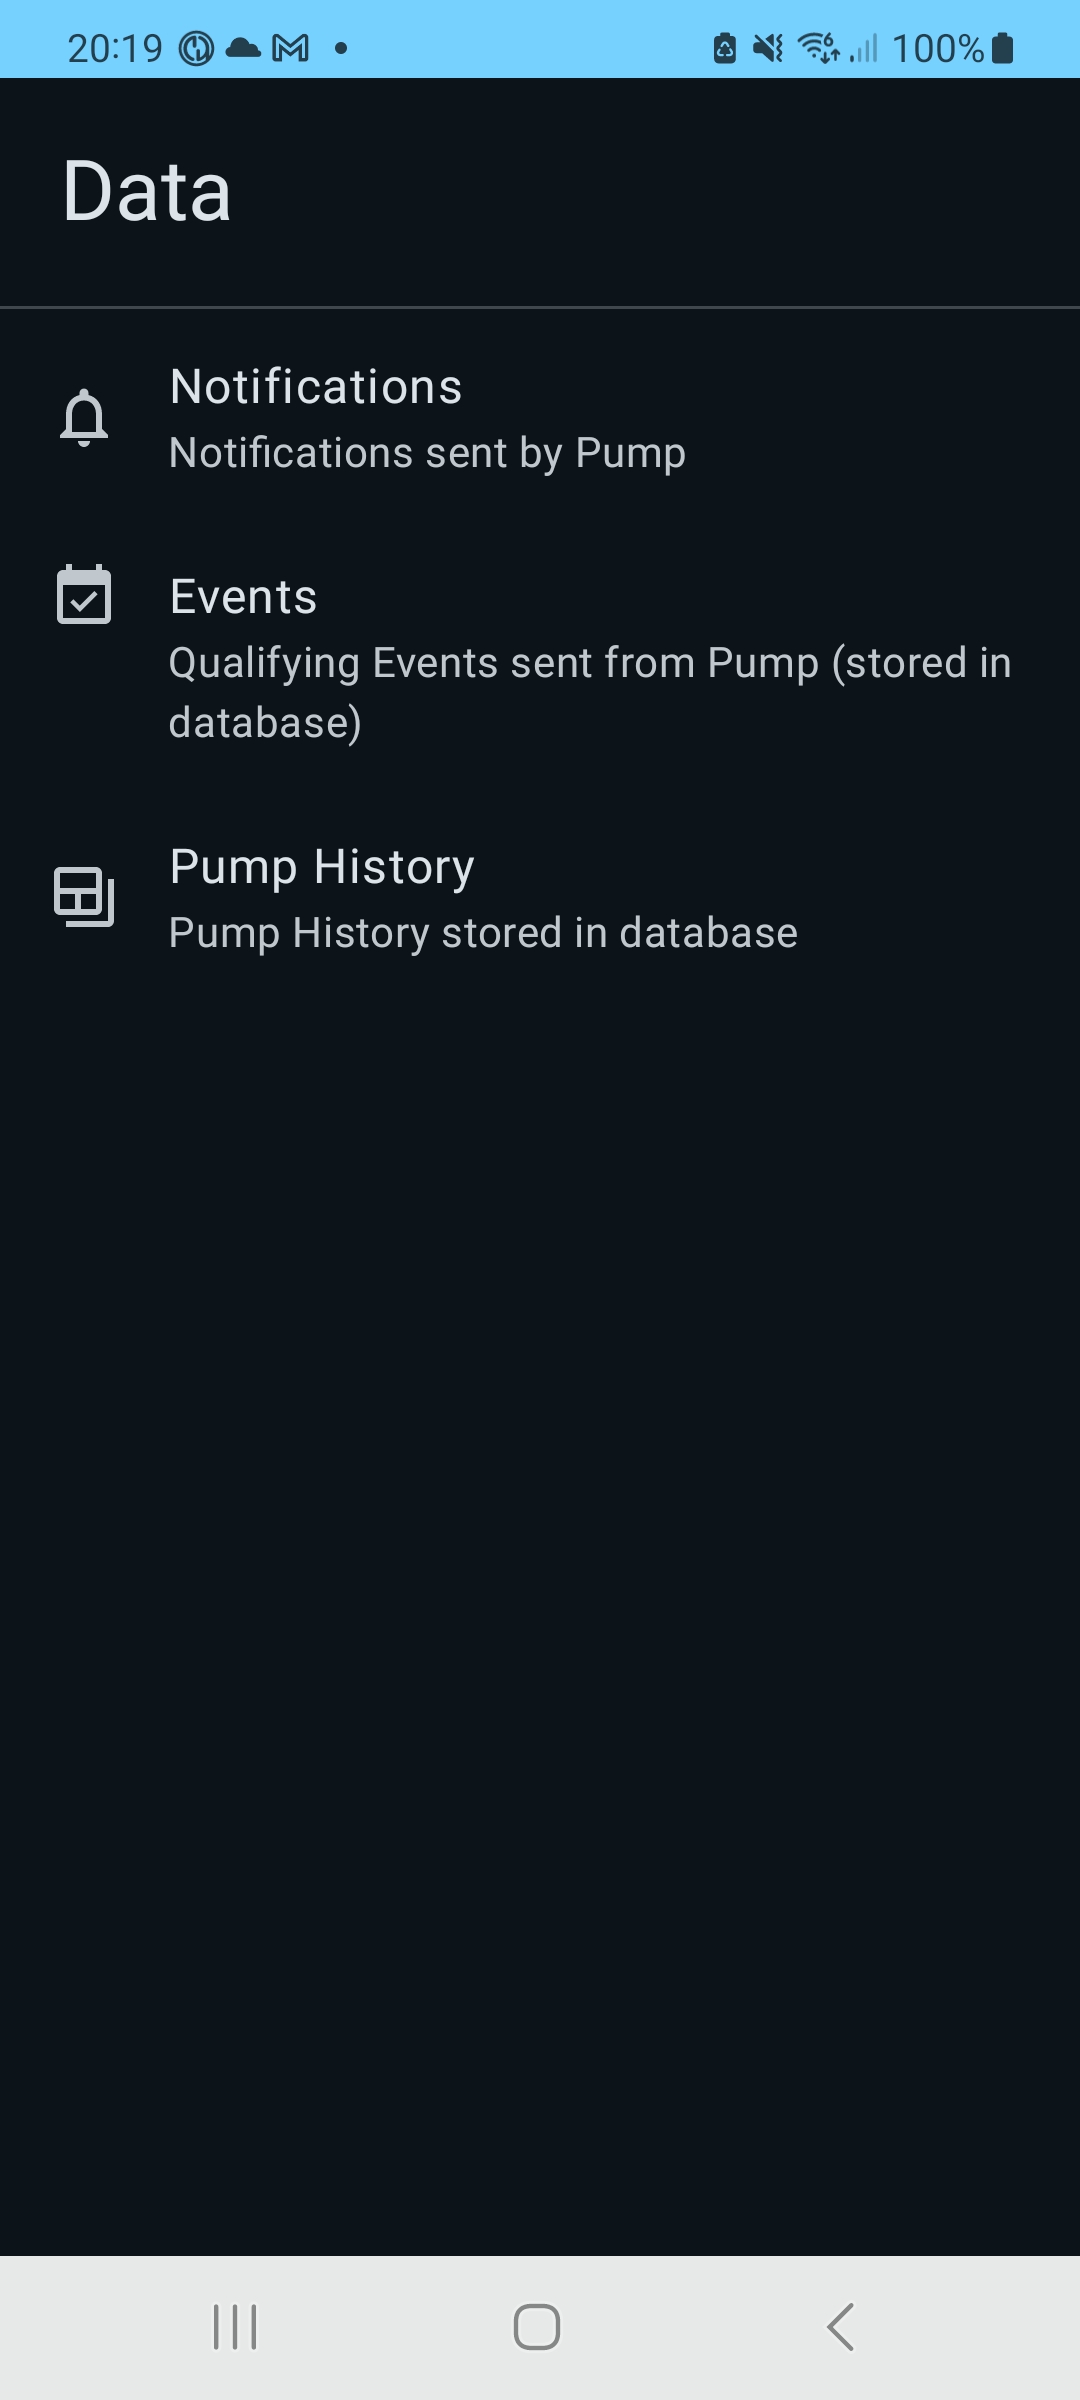
This is the main window from where you can access all 3 options. Events and Pump History are of informational value only, while Notifications can and must be confirmed/dismissed by the user.
Each option will be explained in detail in following sections (and some background is also provided in some other sections, as it will be indicated in each of separate screen):
Notifications
Events
Pump History
Notifications
This screen shows all current notifications, currently in pump. Most of alerts/alarms come with Malfuctions. Some of malfuctions will be filtered. We are slowly adding filtering for all known malfunctions.
If you press on notification, that notification is confirmed and will disapper...
Malfunctions can't be confirmed, but they will disappear when alert/alarm is confirmed.
You can find more information about notifications in Pump Notifications section.
Events
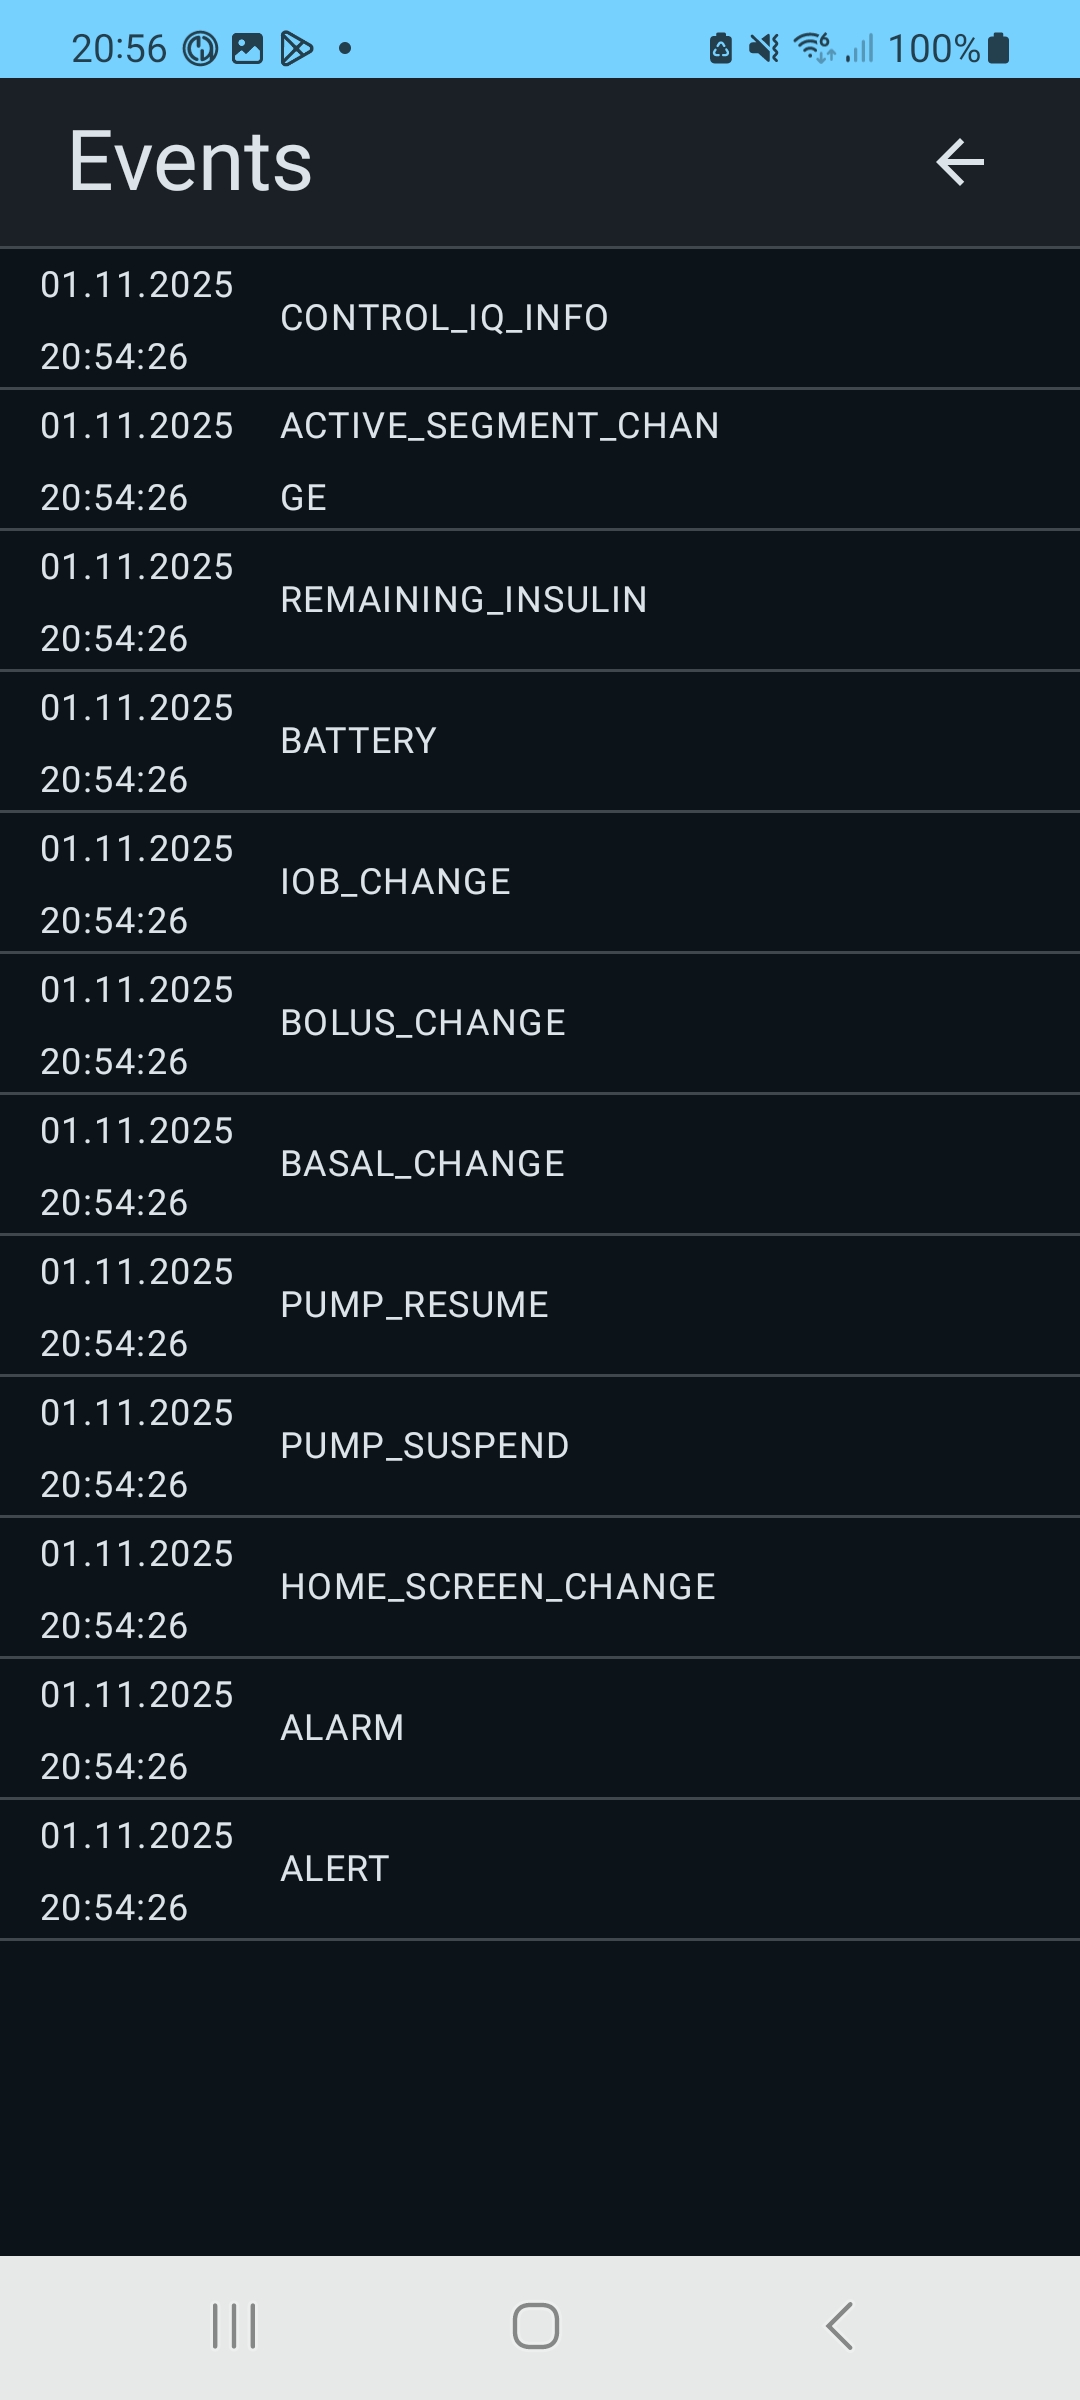
Pump Events are displayed here. When something happens in pump, certain events are sent. Event functionality is not fully working yet in library, which is the main reason that at the moment, driver is not relying on them. We still have scheduled calls to pump, to read status, just so that we don't loose anything.
Events here are only of informational value and just display event keyword.
At the moment there is no plan to extend this functionality.
History
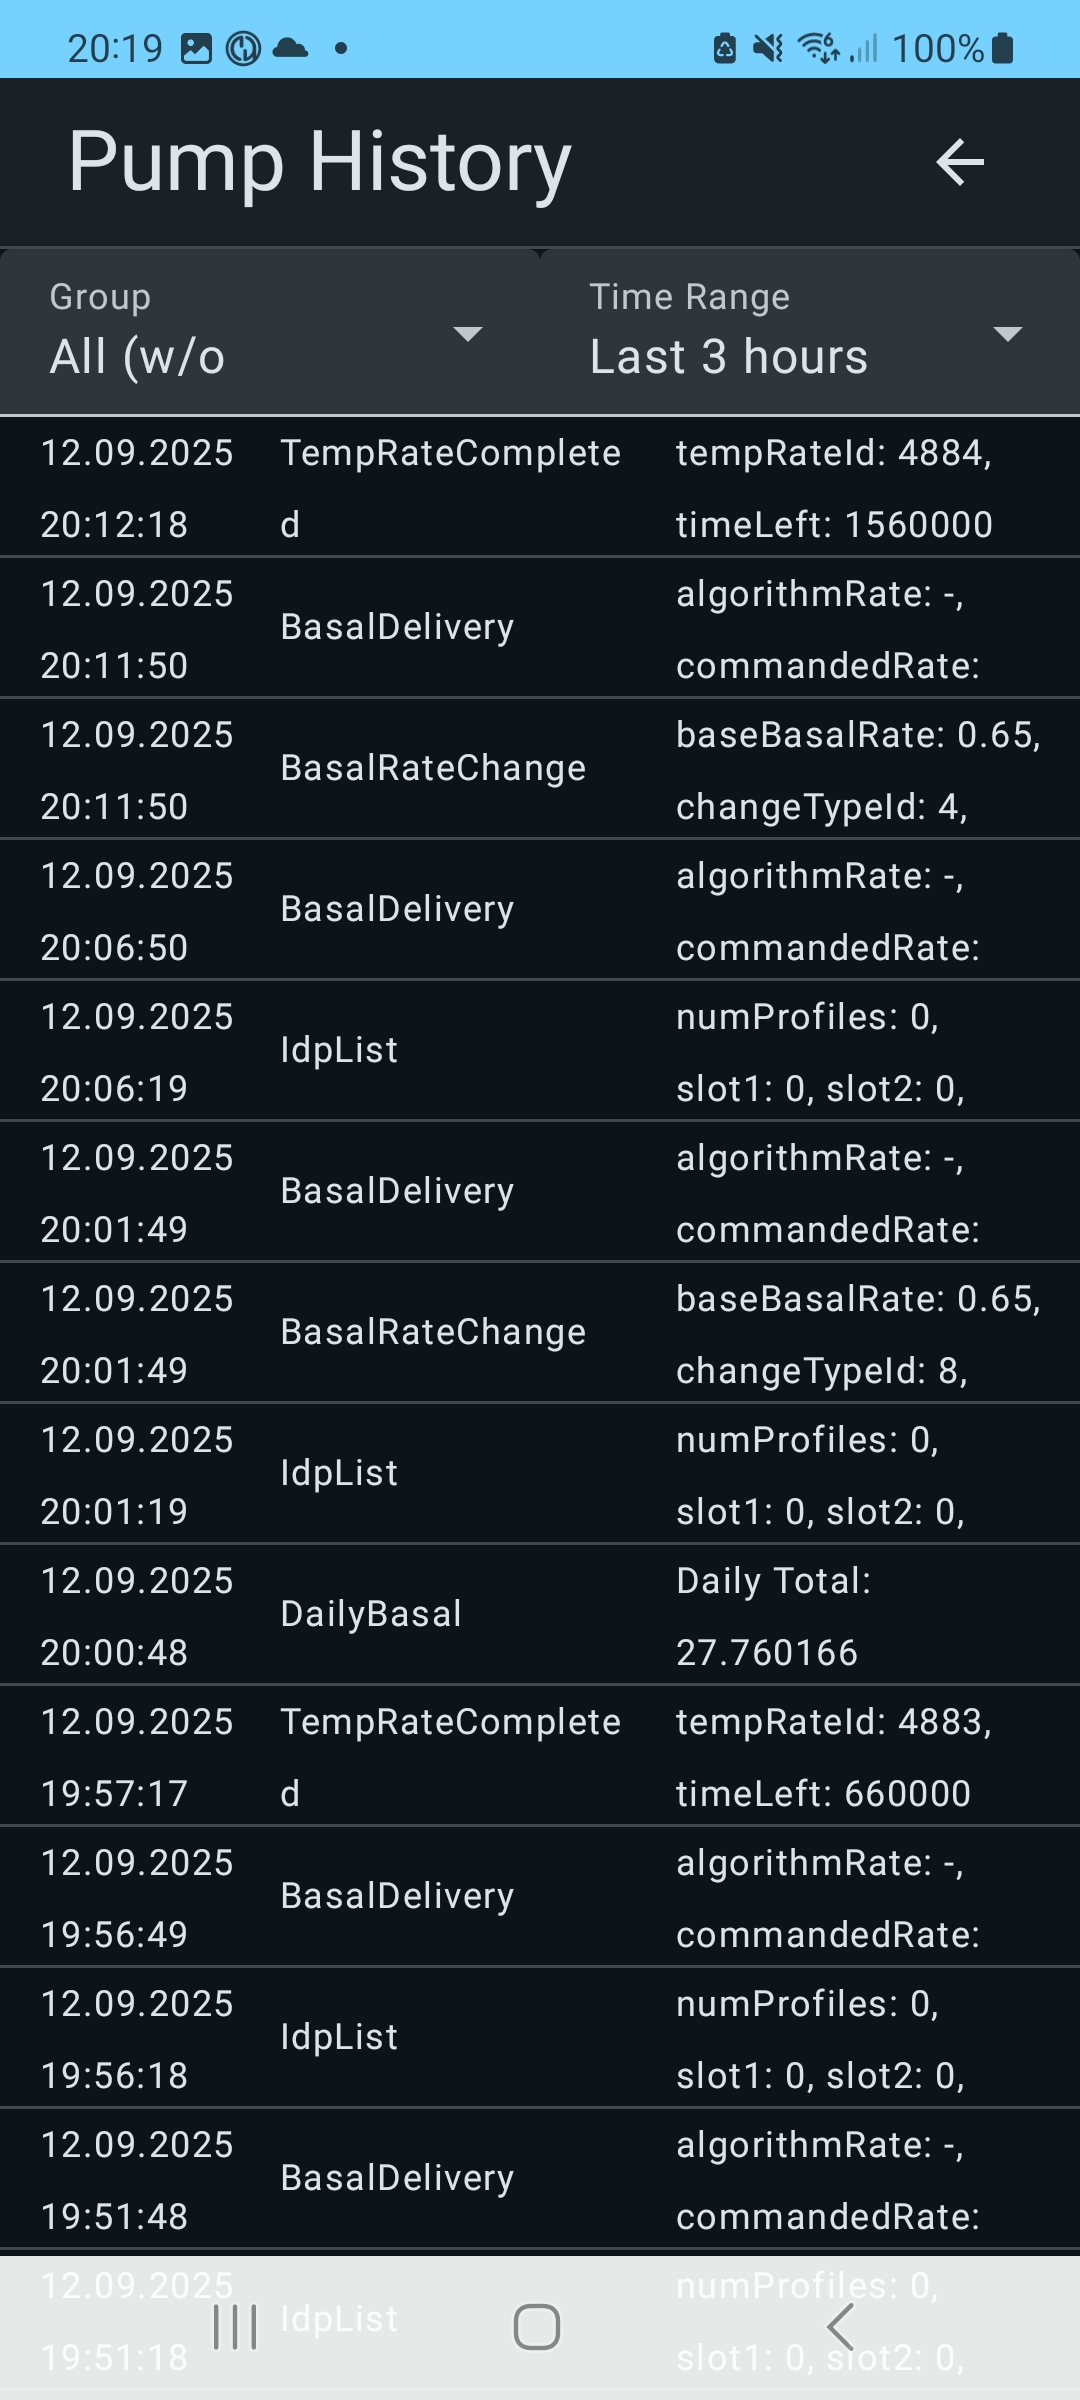
Pump history is retrieved every 5 minutes, together with the Pump Status check. History is always read from latest to oldest. We retrieve at max 5 chunks of history data, each containing 200 records. Once we reach 1.5 months, we don't retrive any more historical data.
So in the beginning, history will read lot of items, but afterwards, only new items will be read. Historical data is also cleaned from the database, so we always have just last 1.5 months, so the database won't grow needlessly.
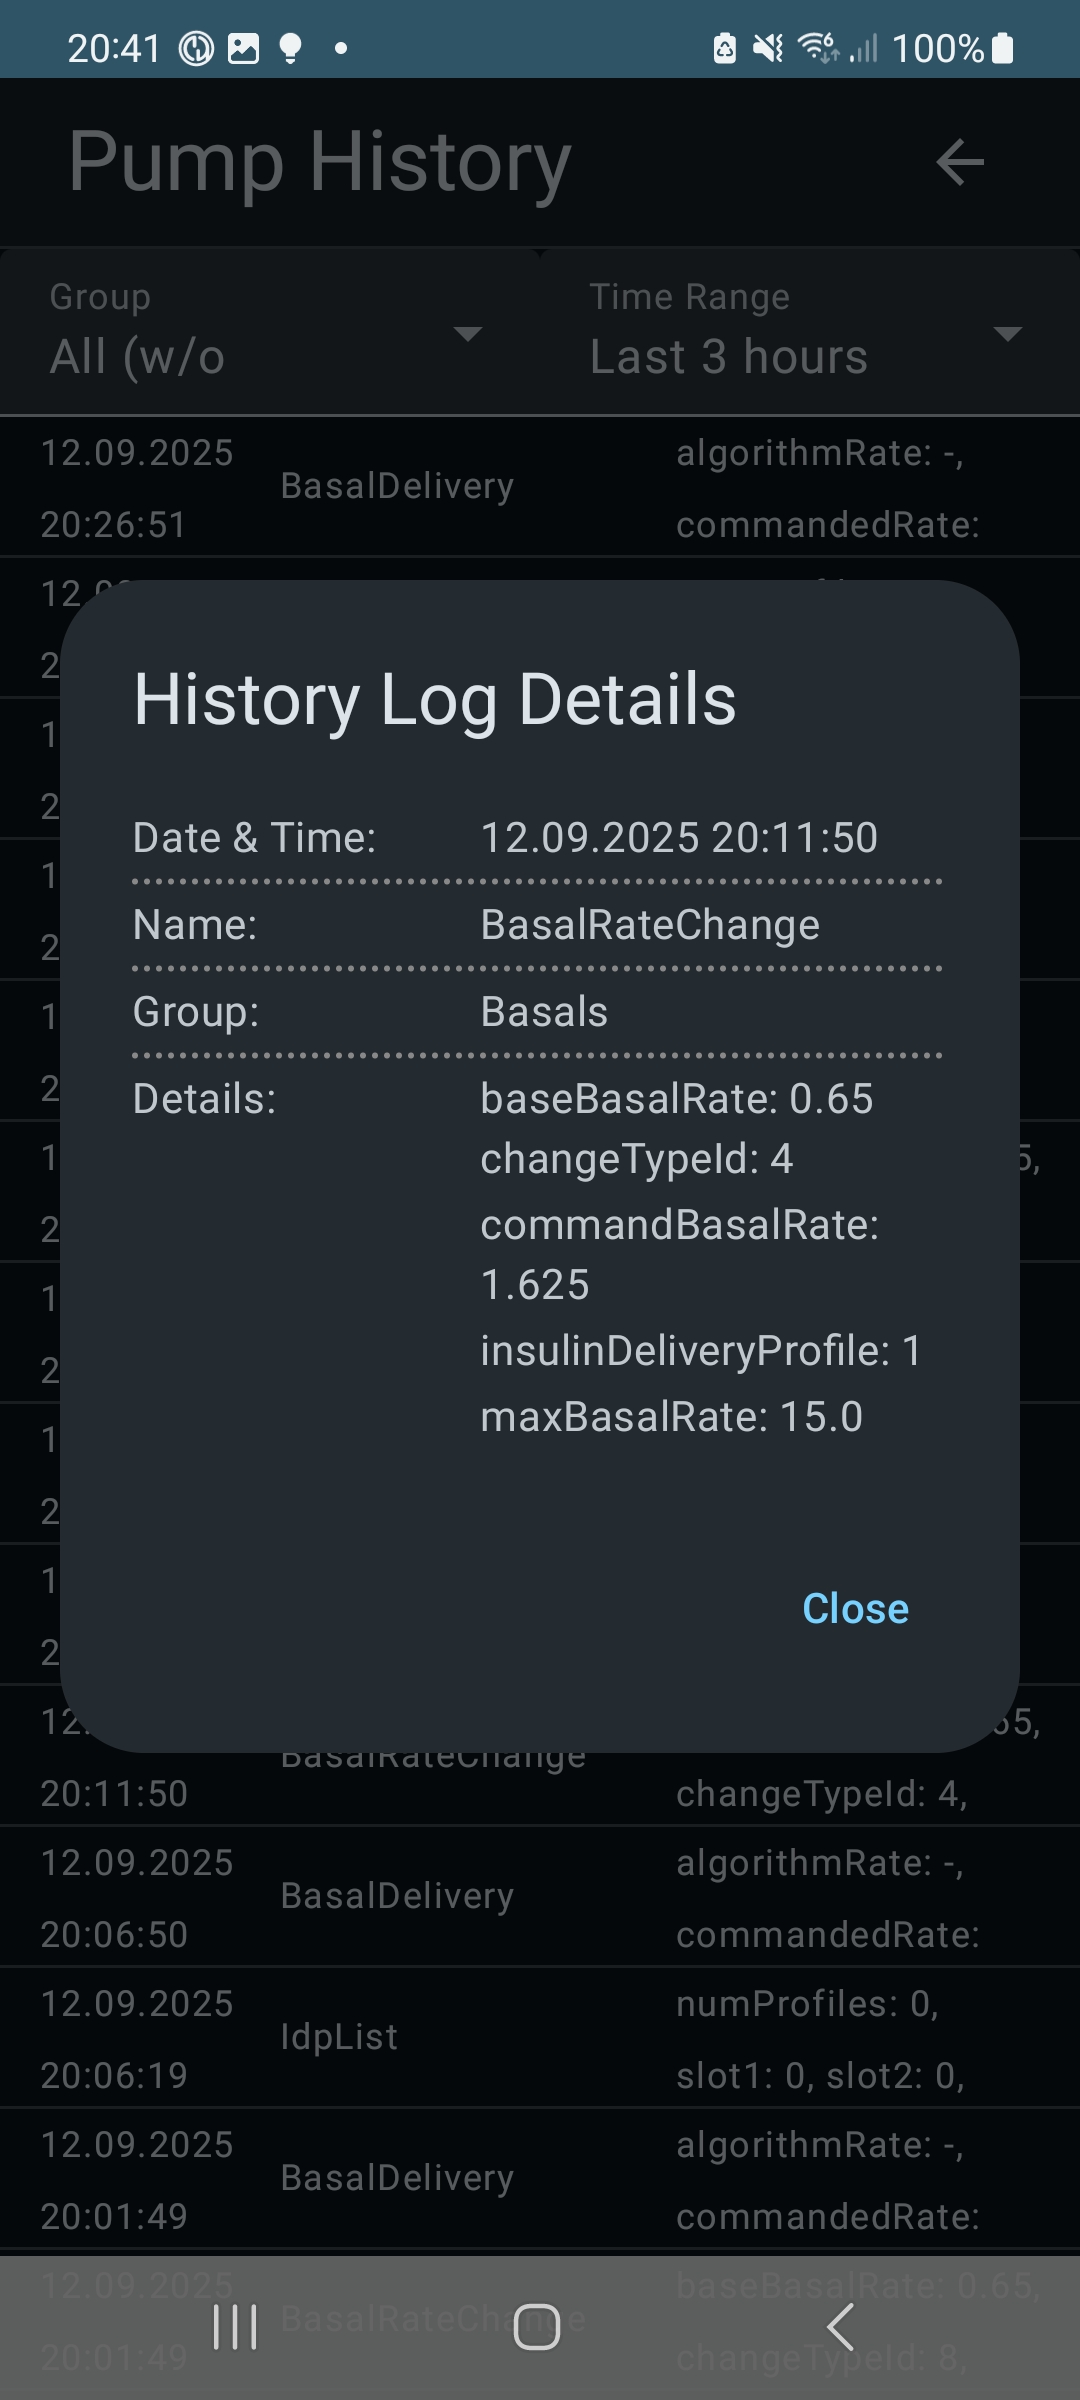
History is not parsed, we just display whatever history fields we have recognized by pumpX2 library. In some cases we do some minor parsing of certain recognizable fields, but not many. This might be extended in future, but history is of information value only and is not used by driver. It can, however, be used as part of validation testing as it is a durable log stored by the pump of operations performed which we can check against AndroidAPS' log of actions it has performed.
You can see details of item, by clicking/pressing on them.
Items can be filtered by Group, default option, displays all item, except Unknown items.
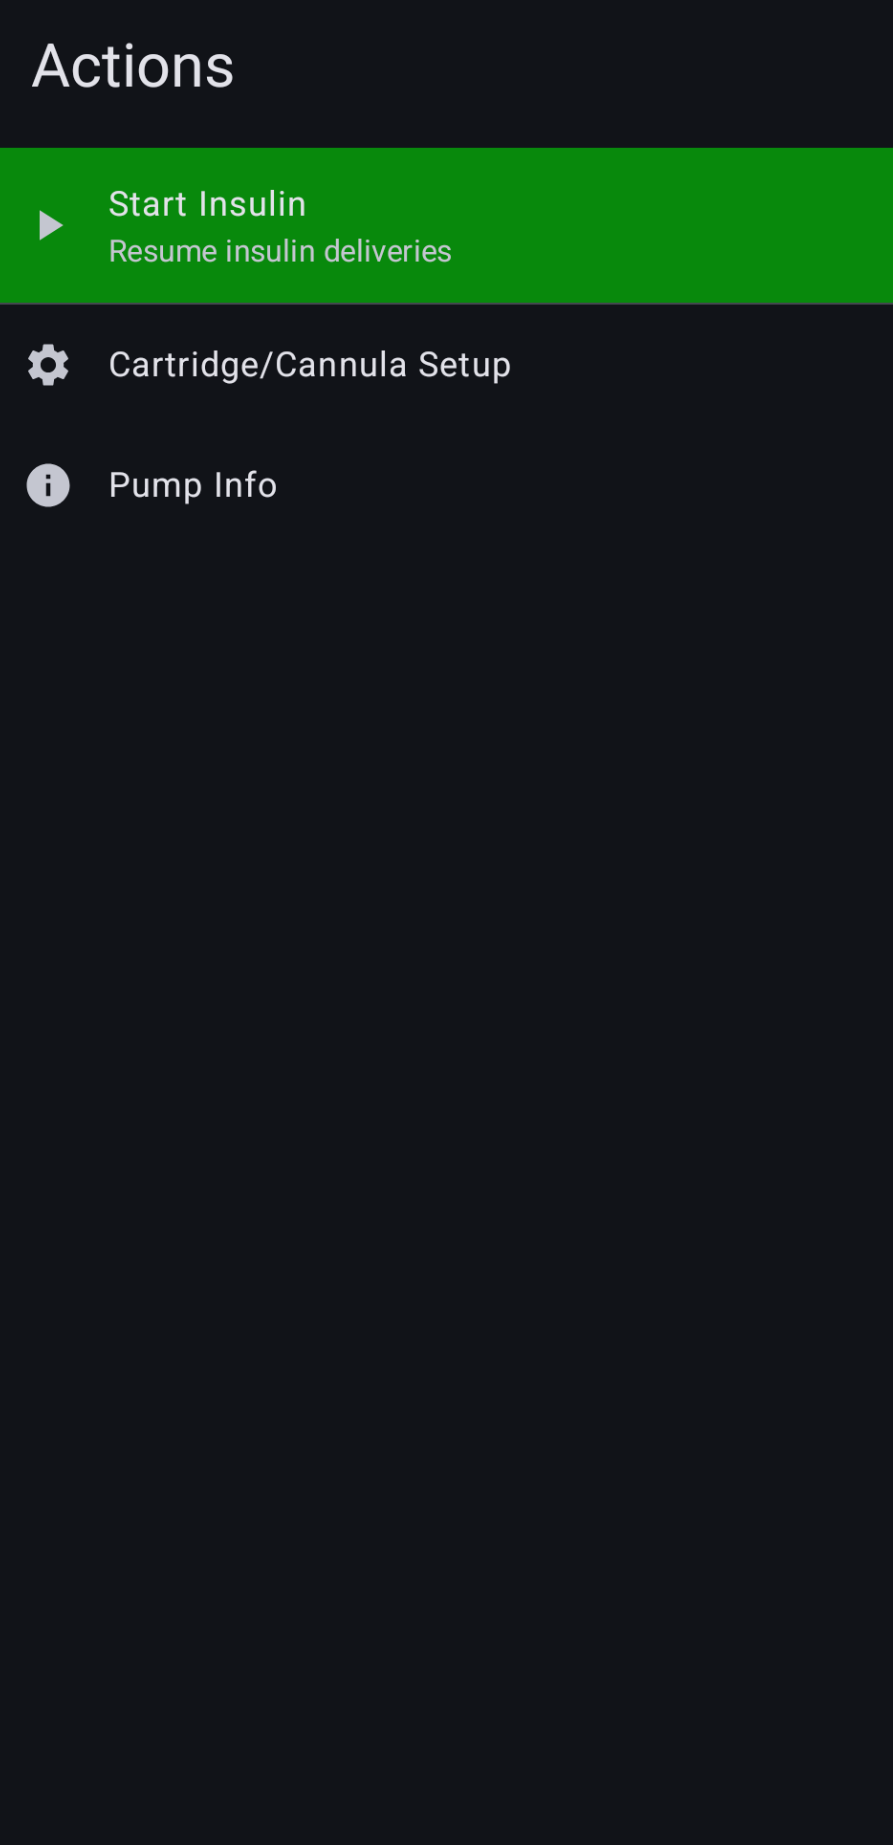
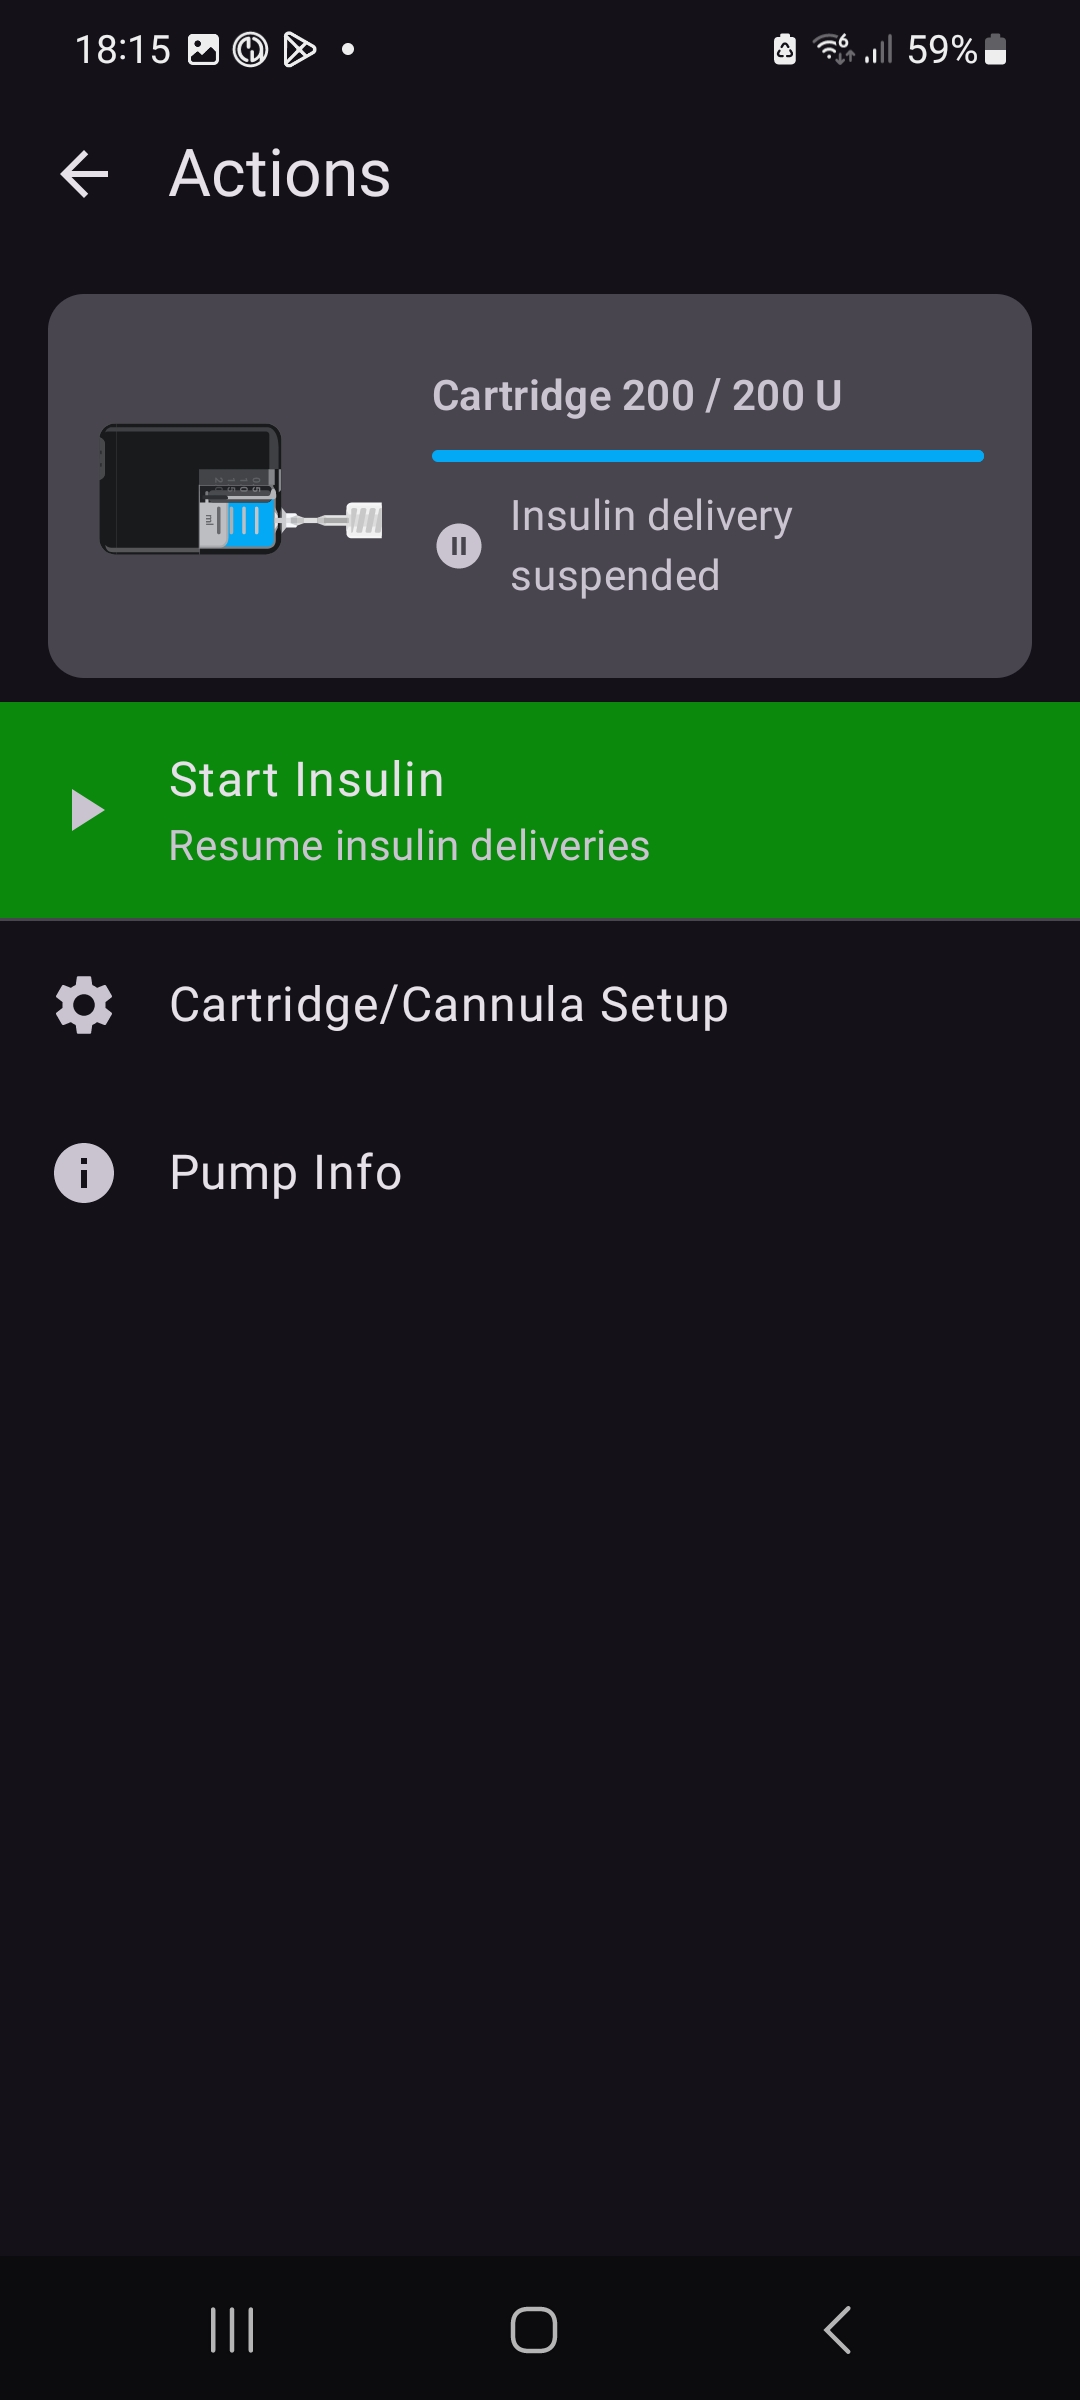
Opening the Settings page gives you a list of possible actions. You can access this page from the Tandem Mobi Overview. All the instructions in this section will start from this page.
Starting or Stopping the Pump
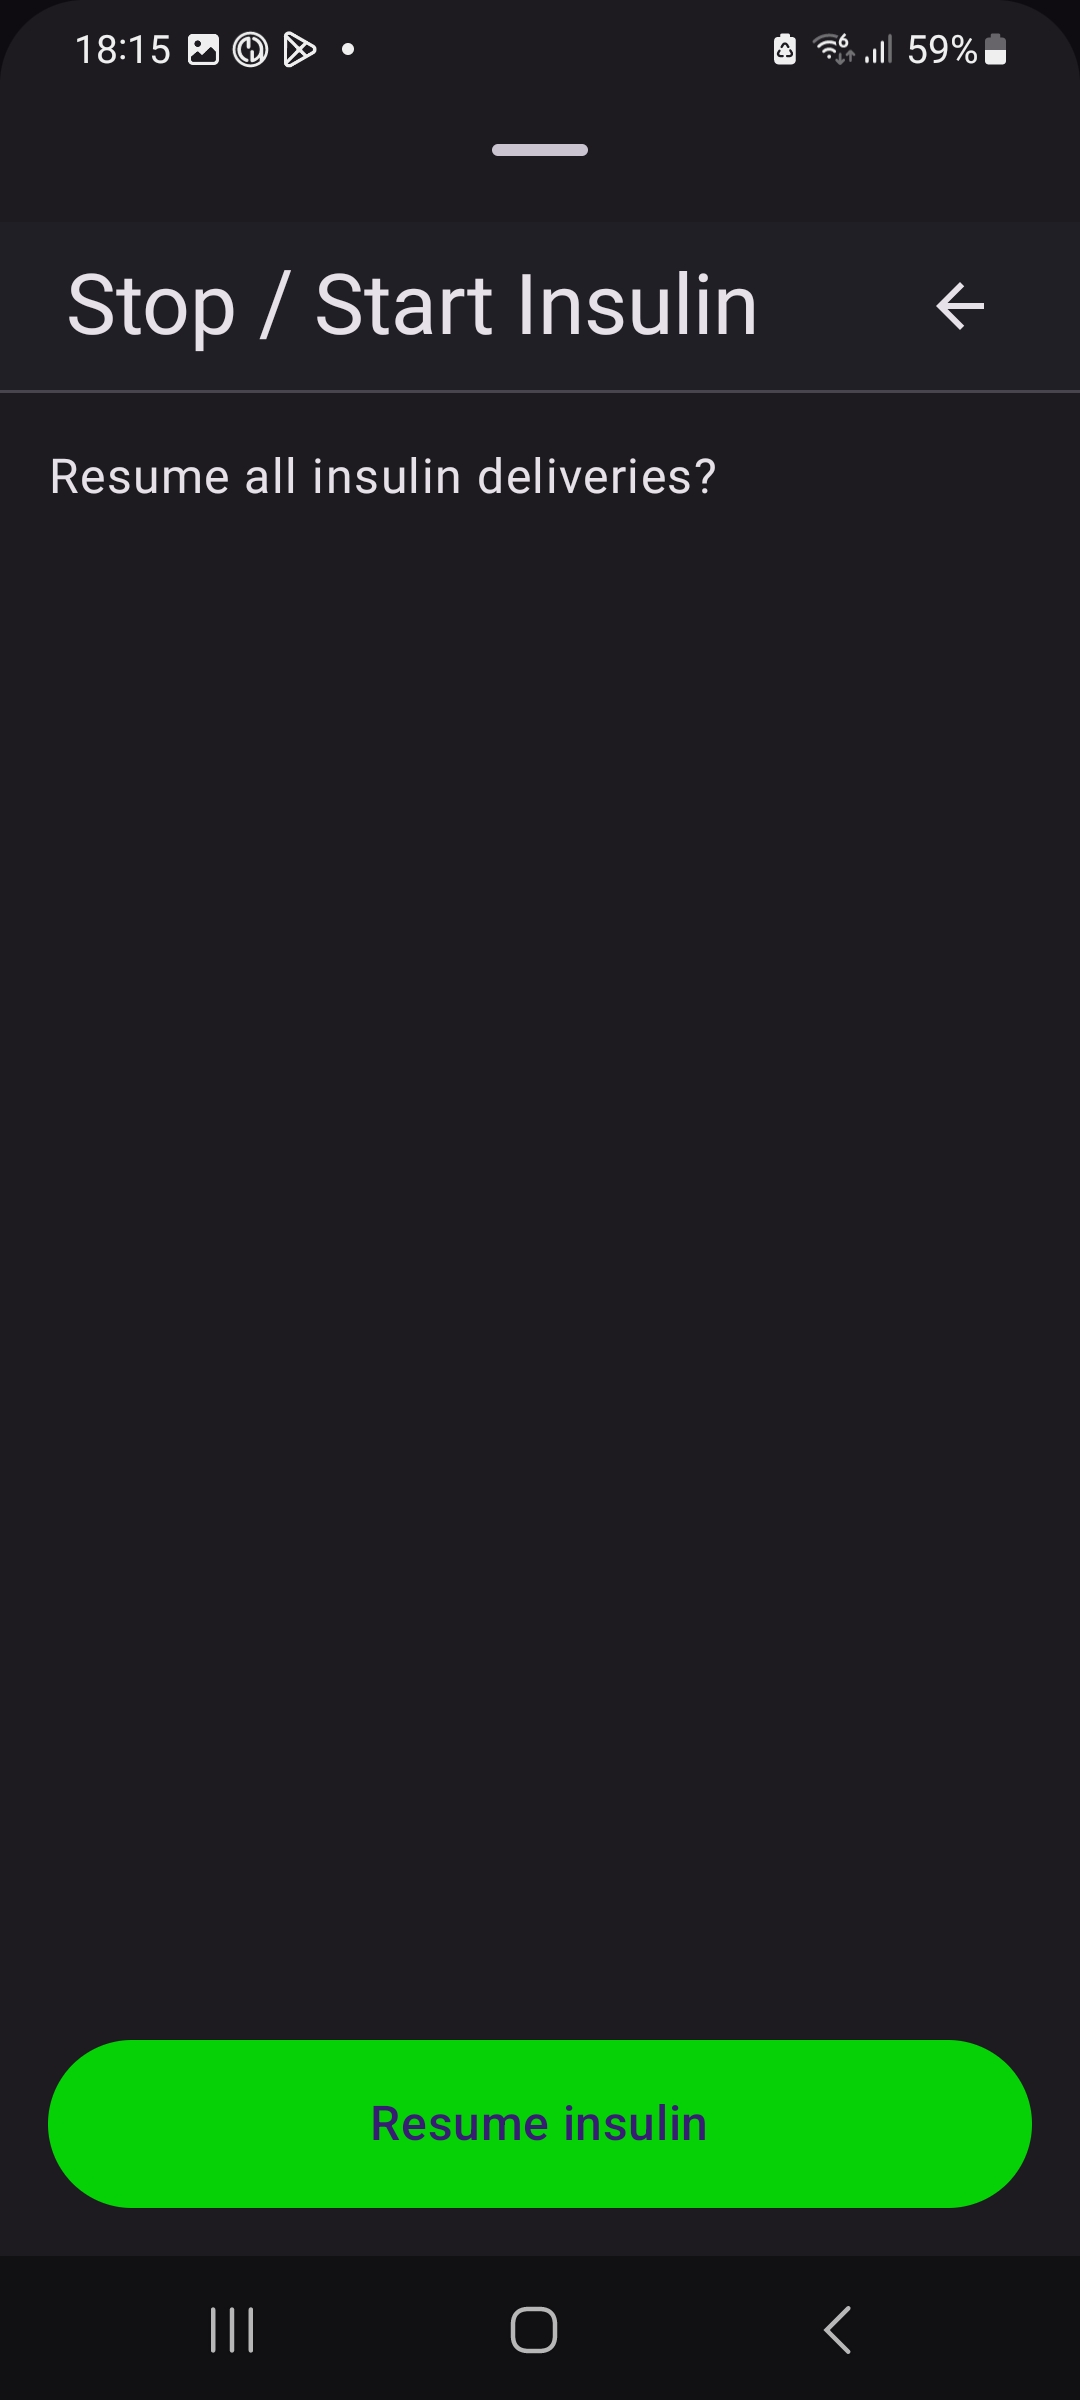
To resume insulin, select "Start Insulin", then "Resume Insulin" on the dialog popup
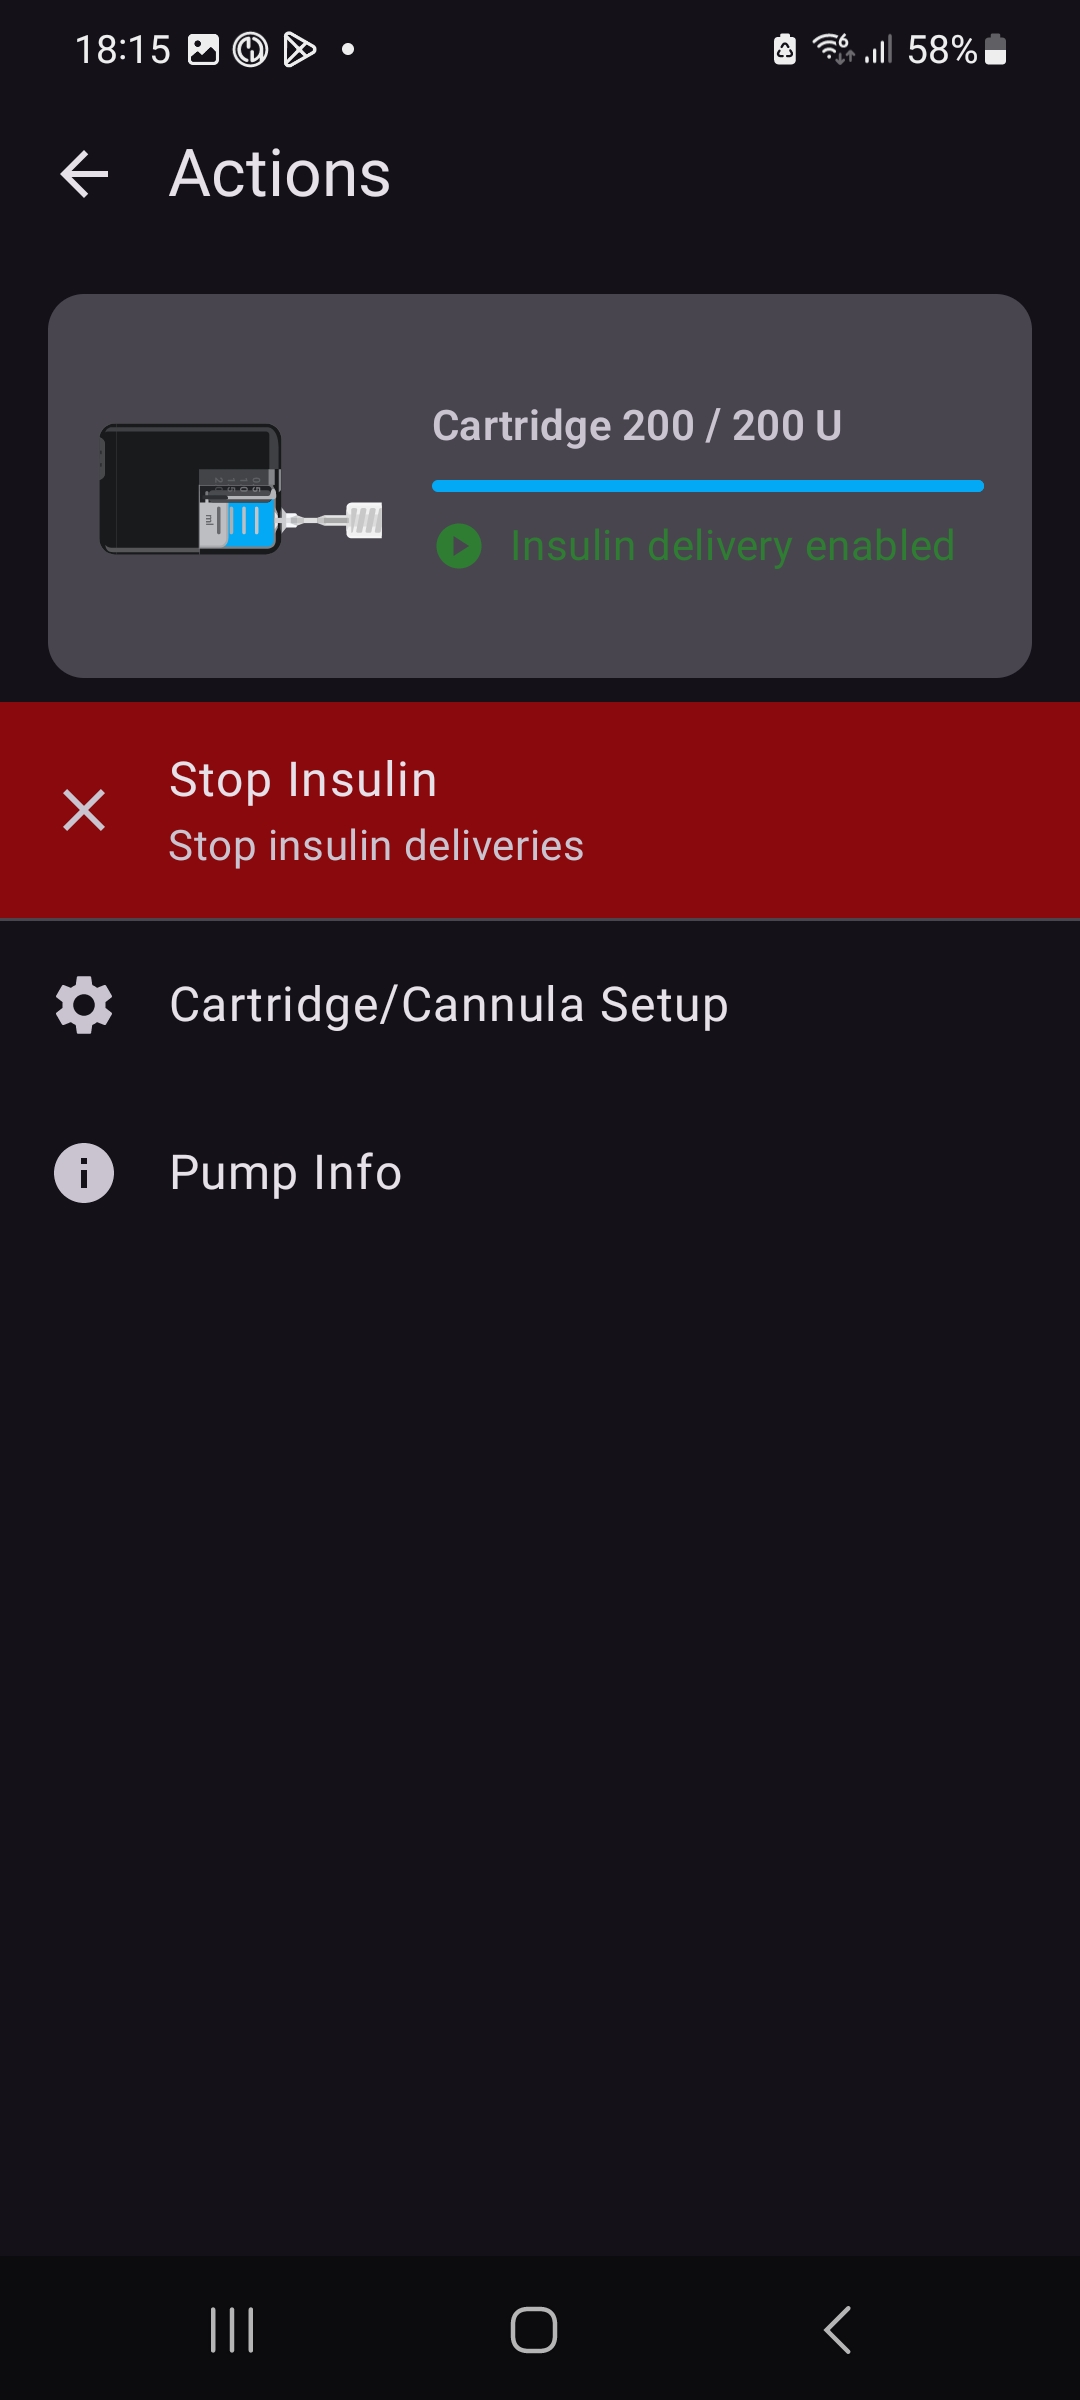
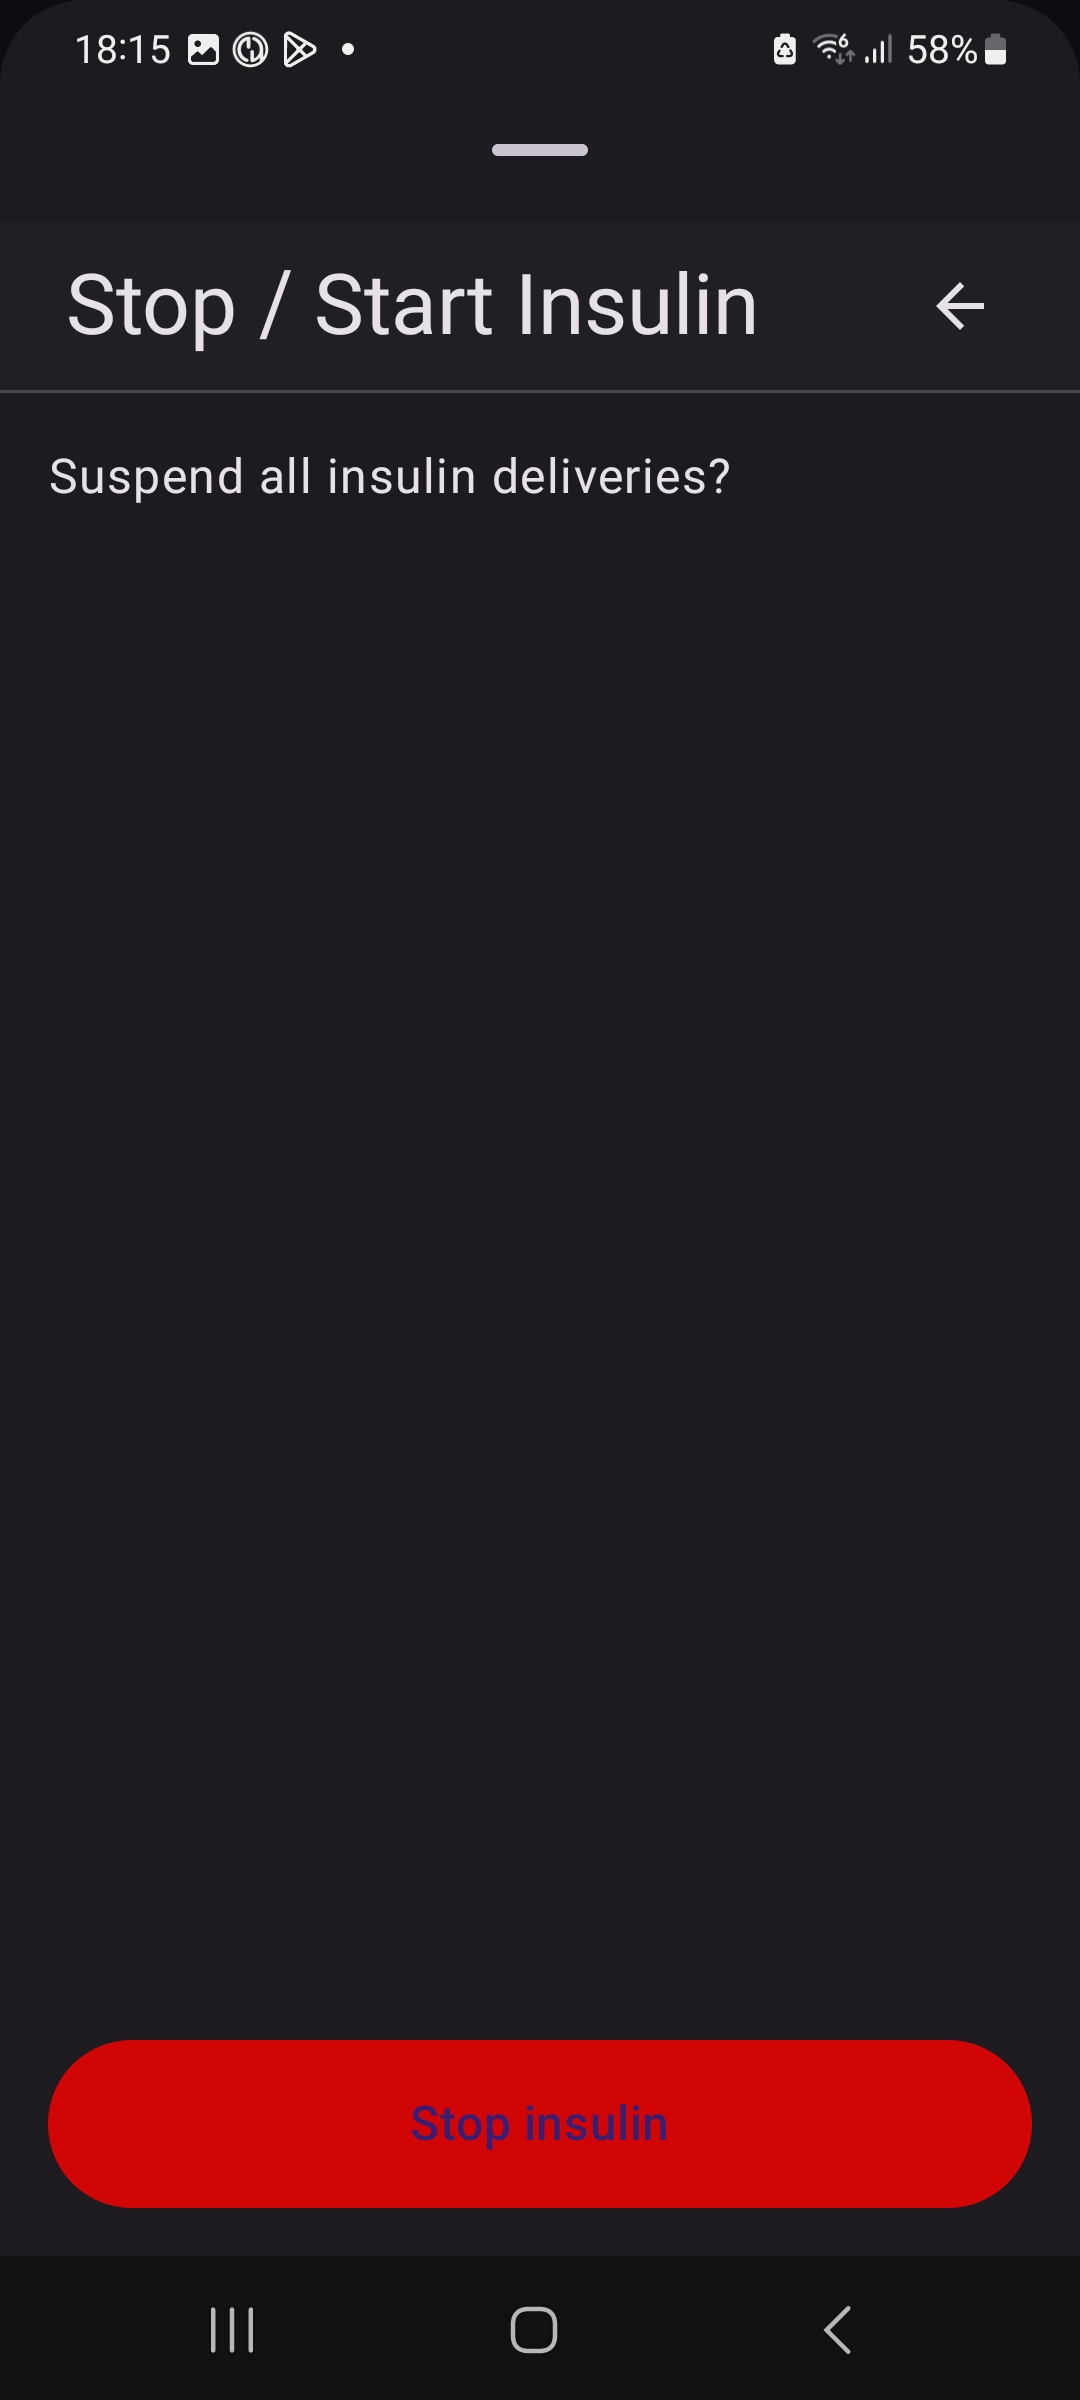
To stop insulin, select "Stop Insulin", then "Stop Insulin" on the dialog popup
If there is a TBR running, you can't stop insulin. If a TBR is running an extra option will be displayed. Clicking it will stop TBR.
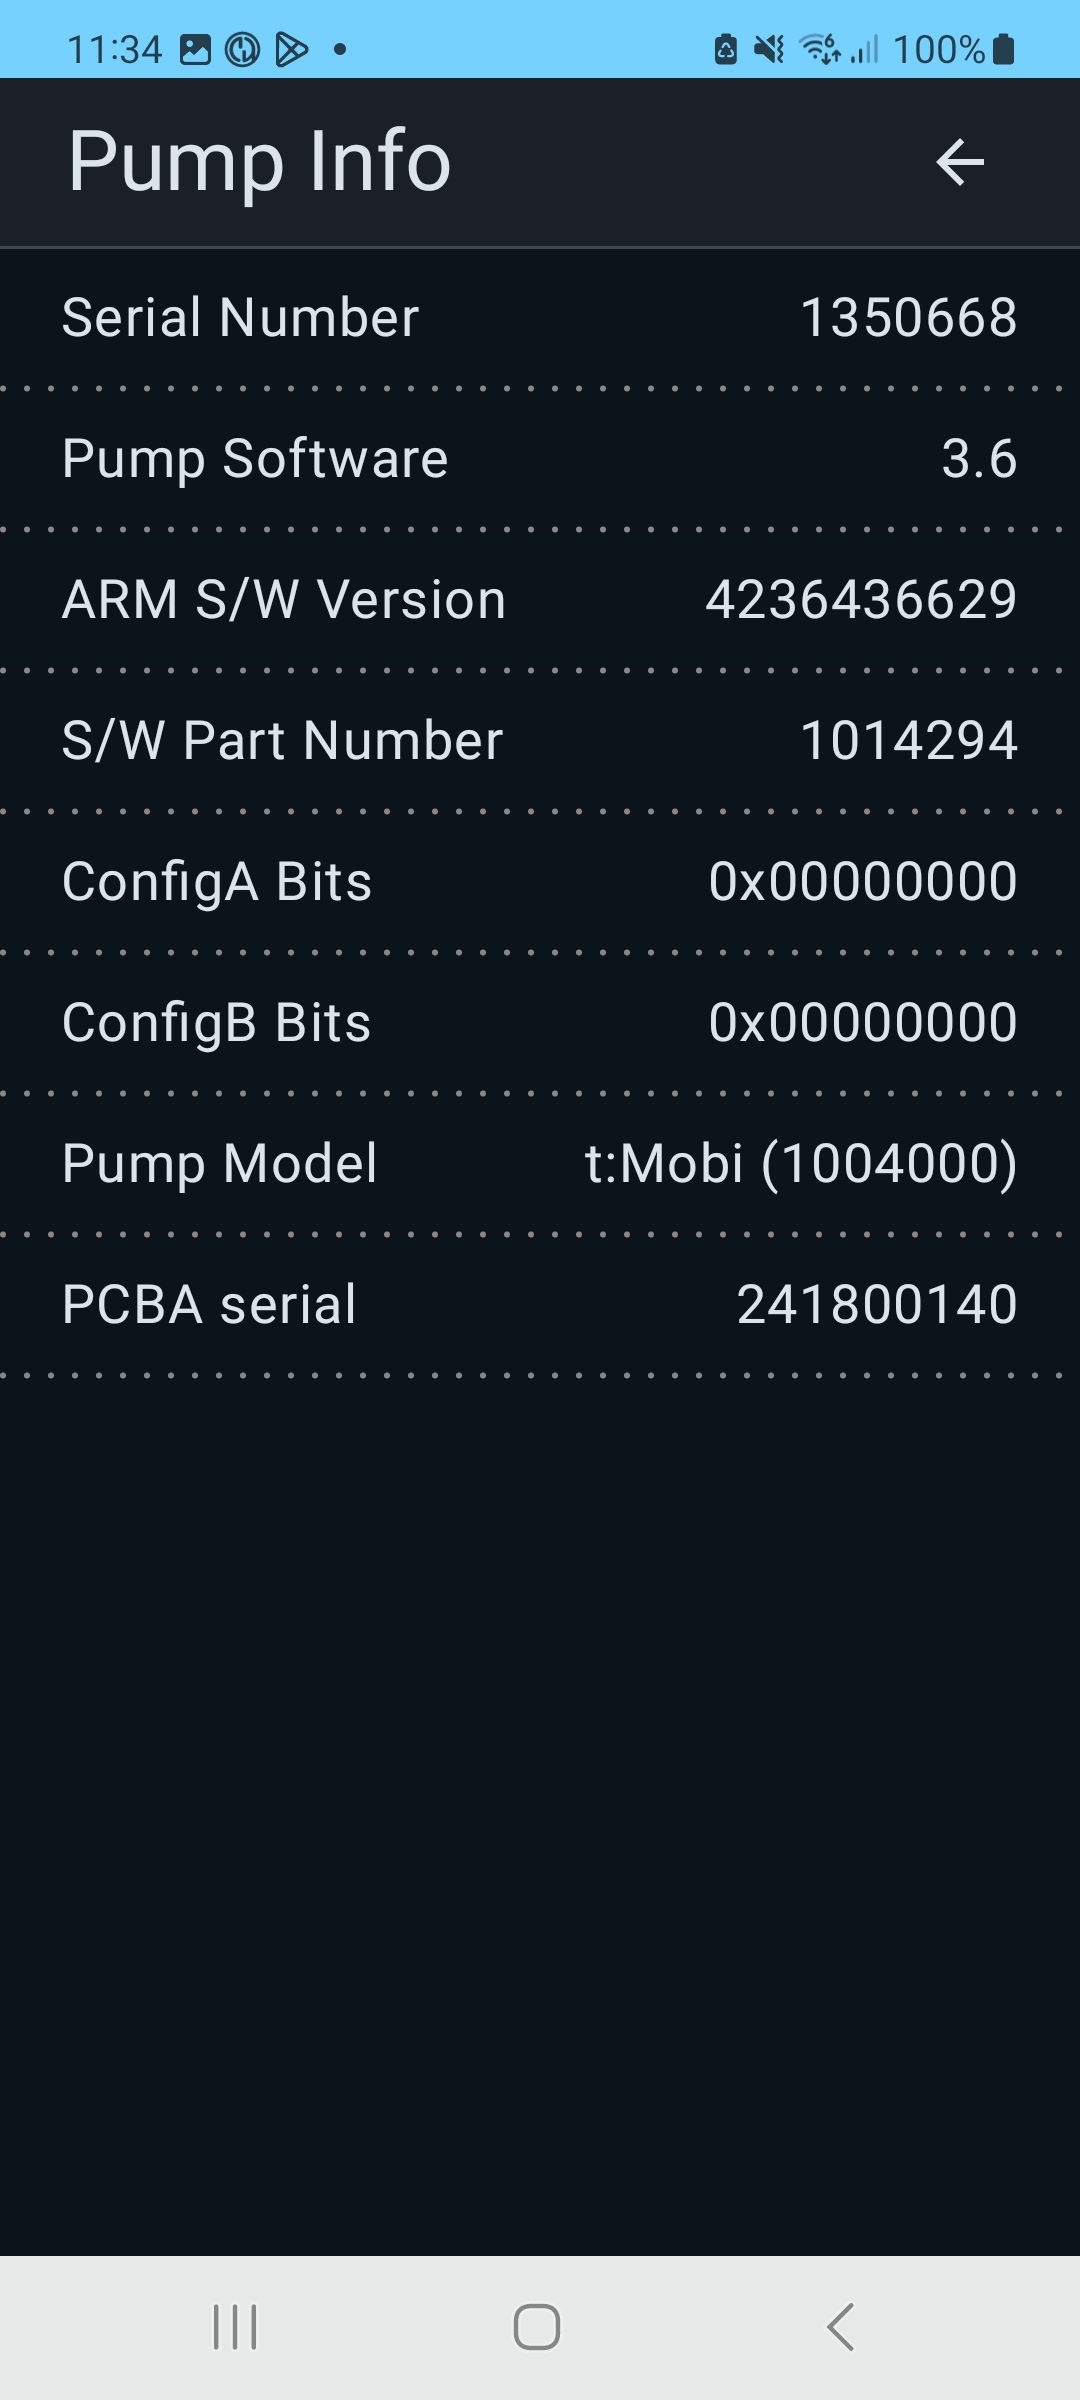
Pump Info
This window just displays basic information about the pump. This is mostly technical information, which might be needed if you had to contact Tandem support about a problem. Please don't mention that you are using AndroidAPS or ControlX2 as they will have no idea what you are talking about and might be less than helpful. While using AAPS should not explicitly void your warranty, it is frowned upon (they want you to use their original software - which is not existent (on Android) at the time of writing of this document).
Follow the instructions below for starting/stopping your pump, changing the cartridge, and filling the tubing or cannula.
Changing Cartridge
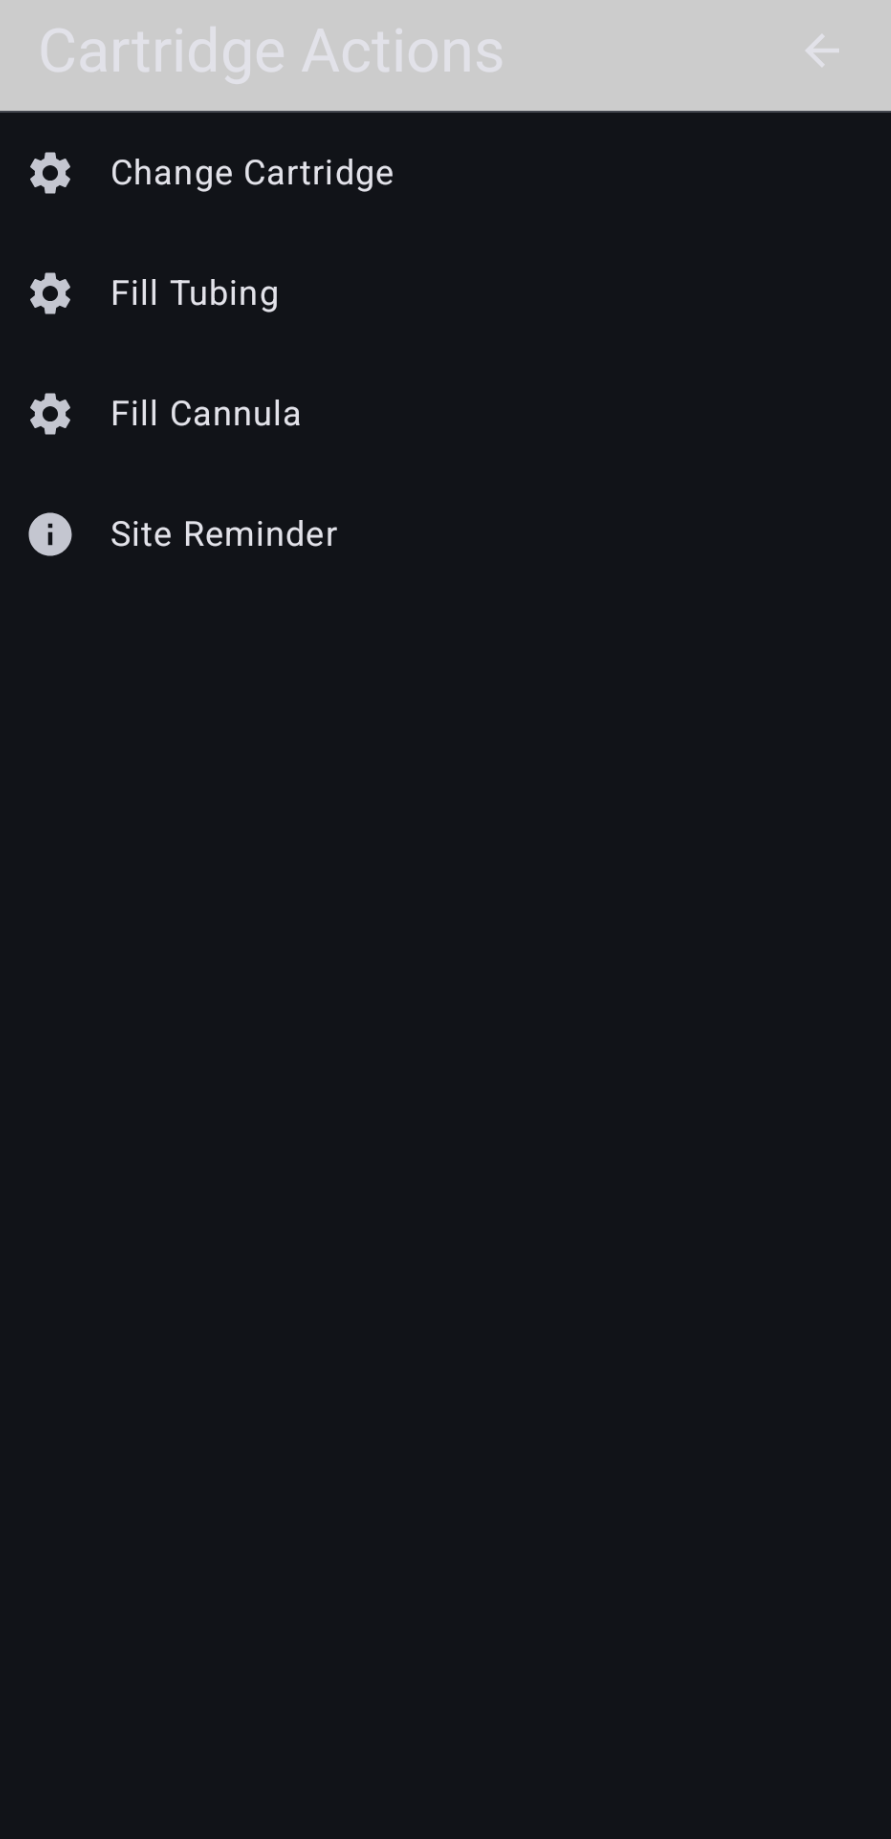
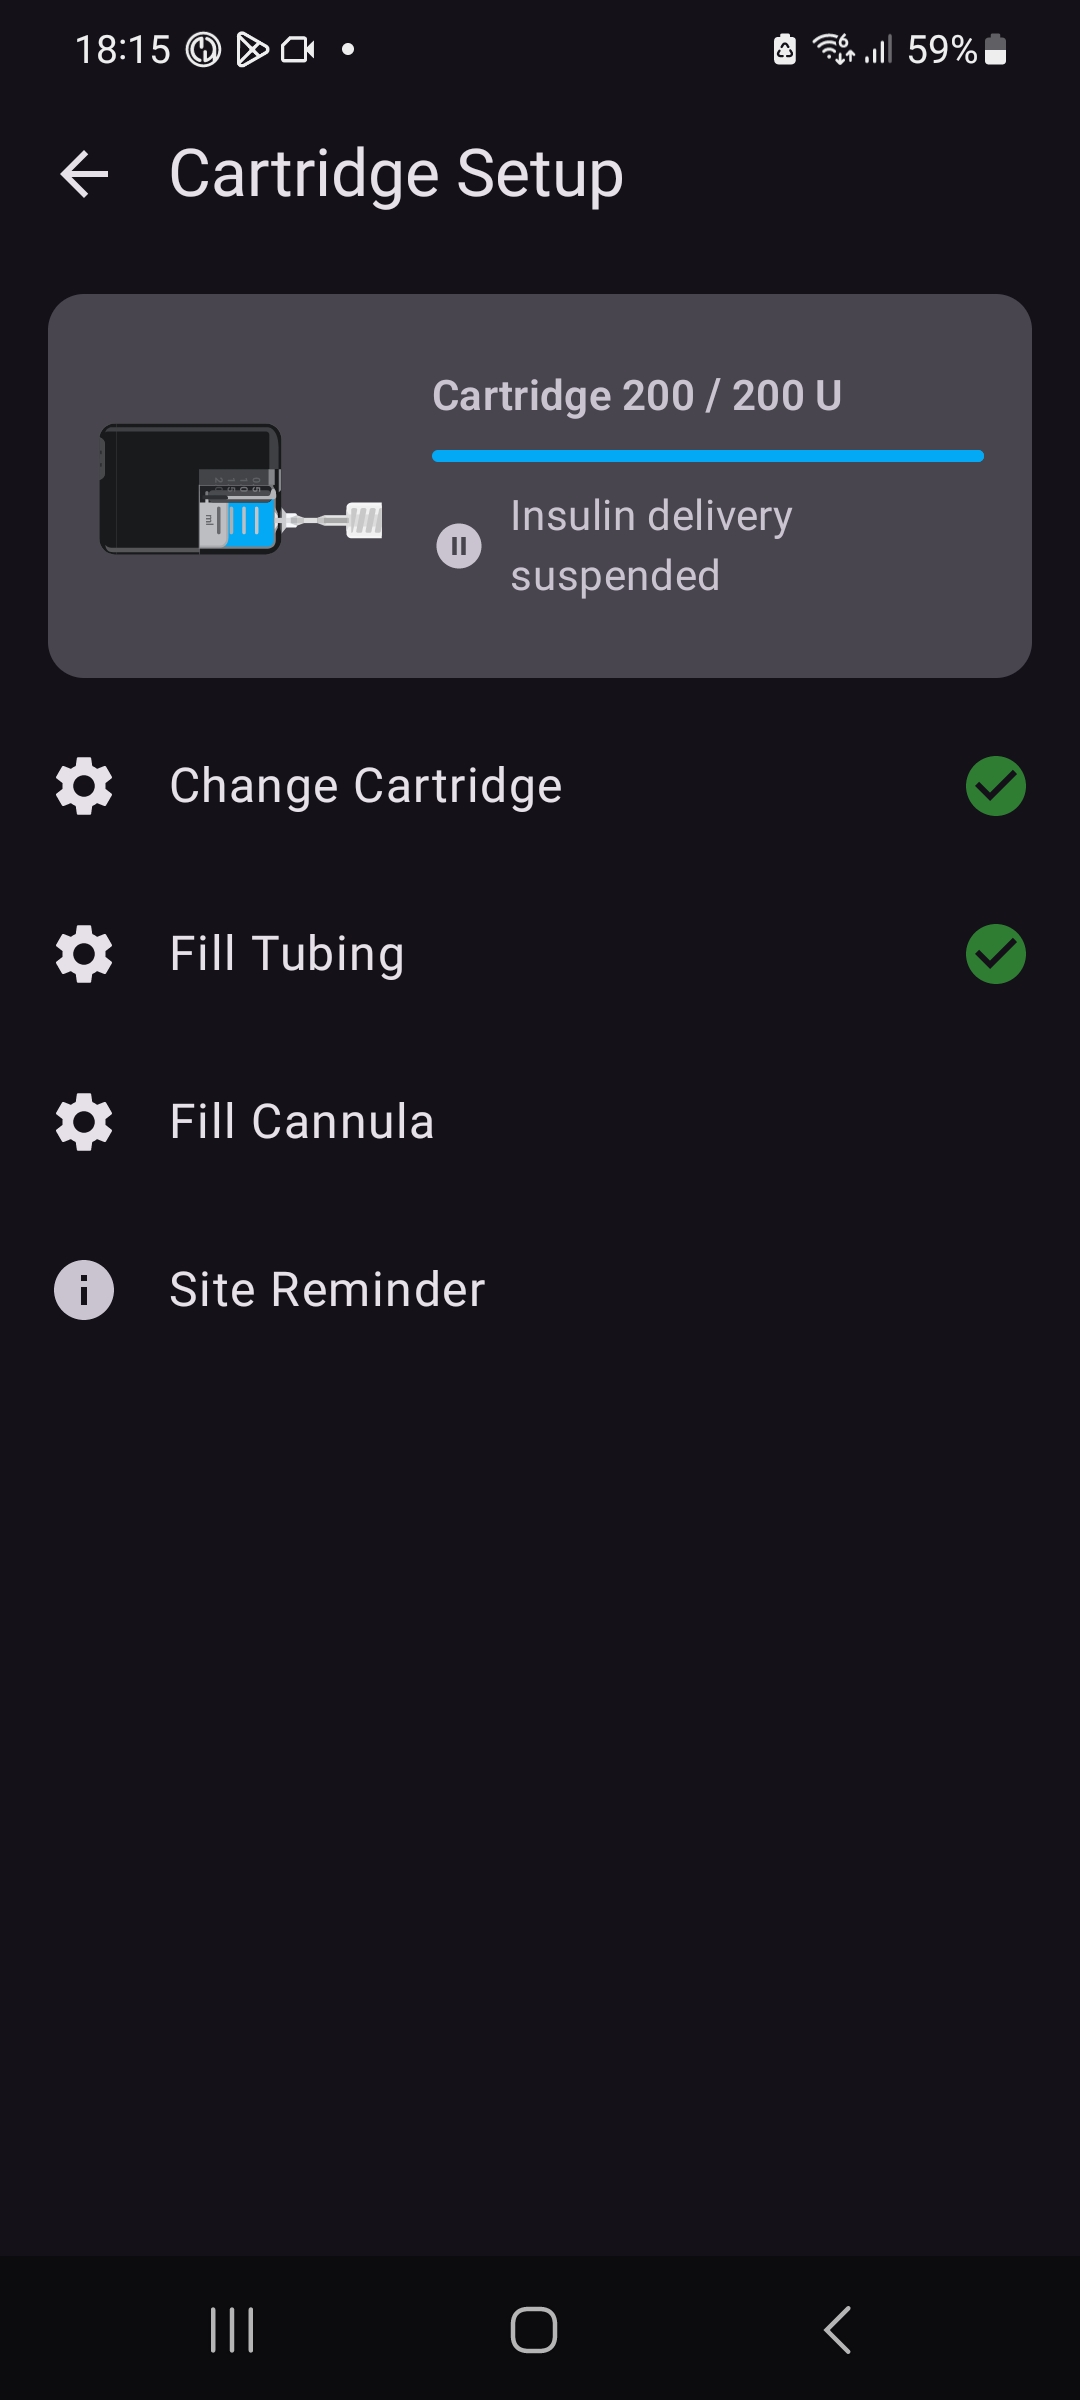
Select "Cartridge/Cannula Setup"
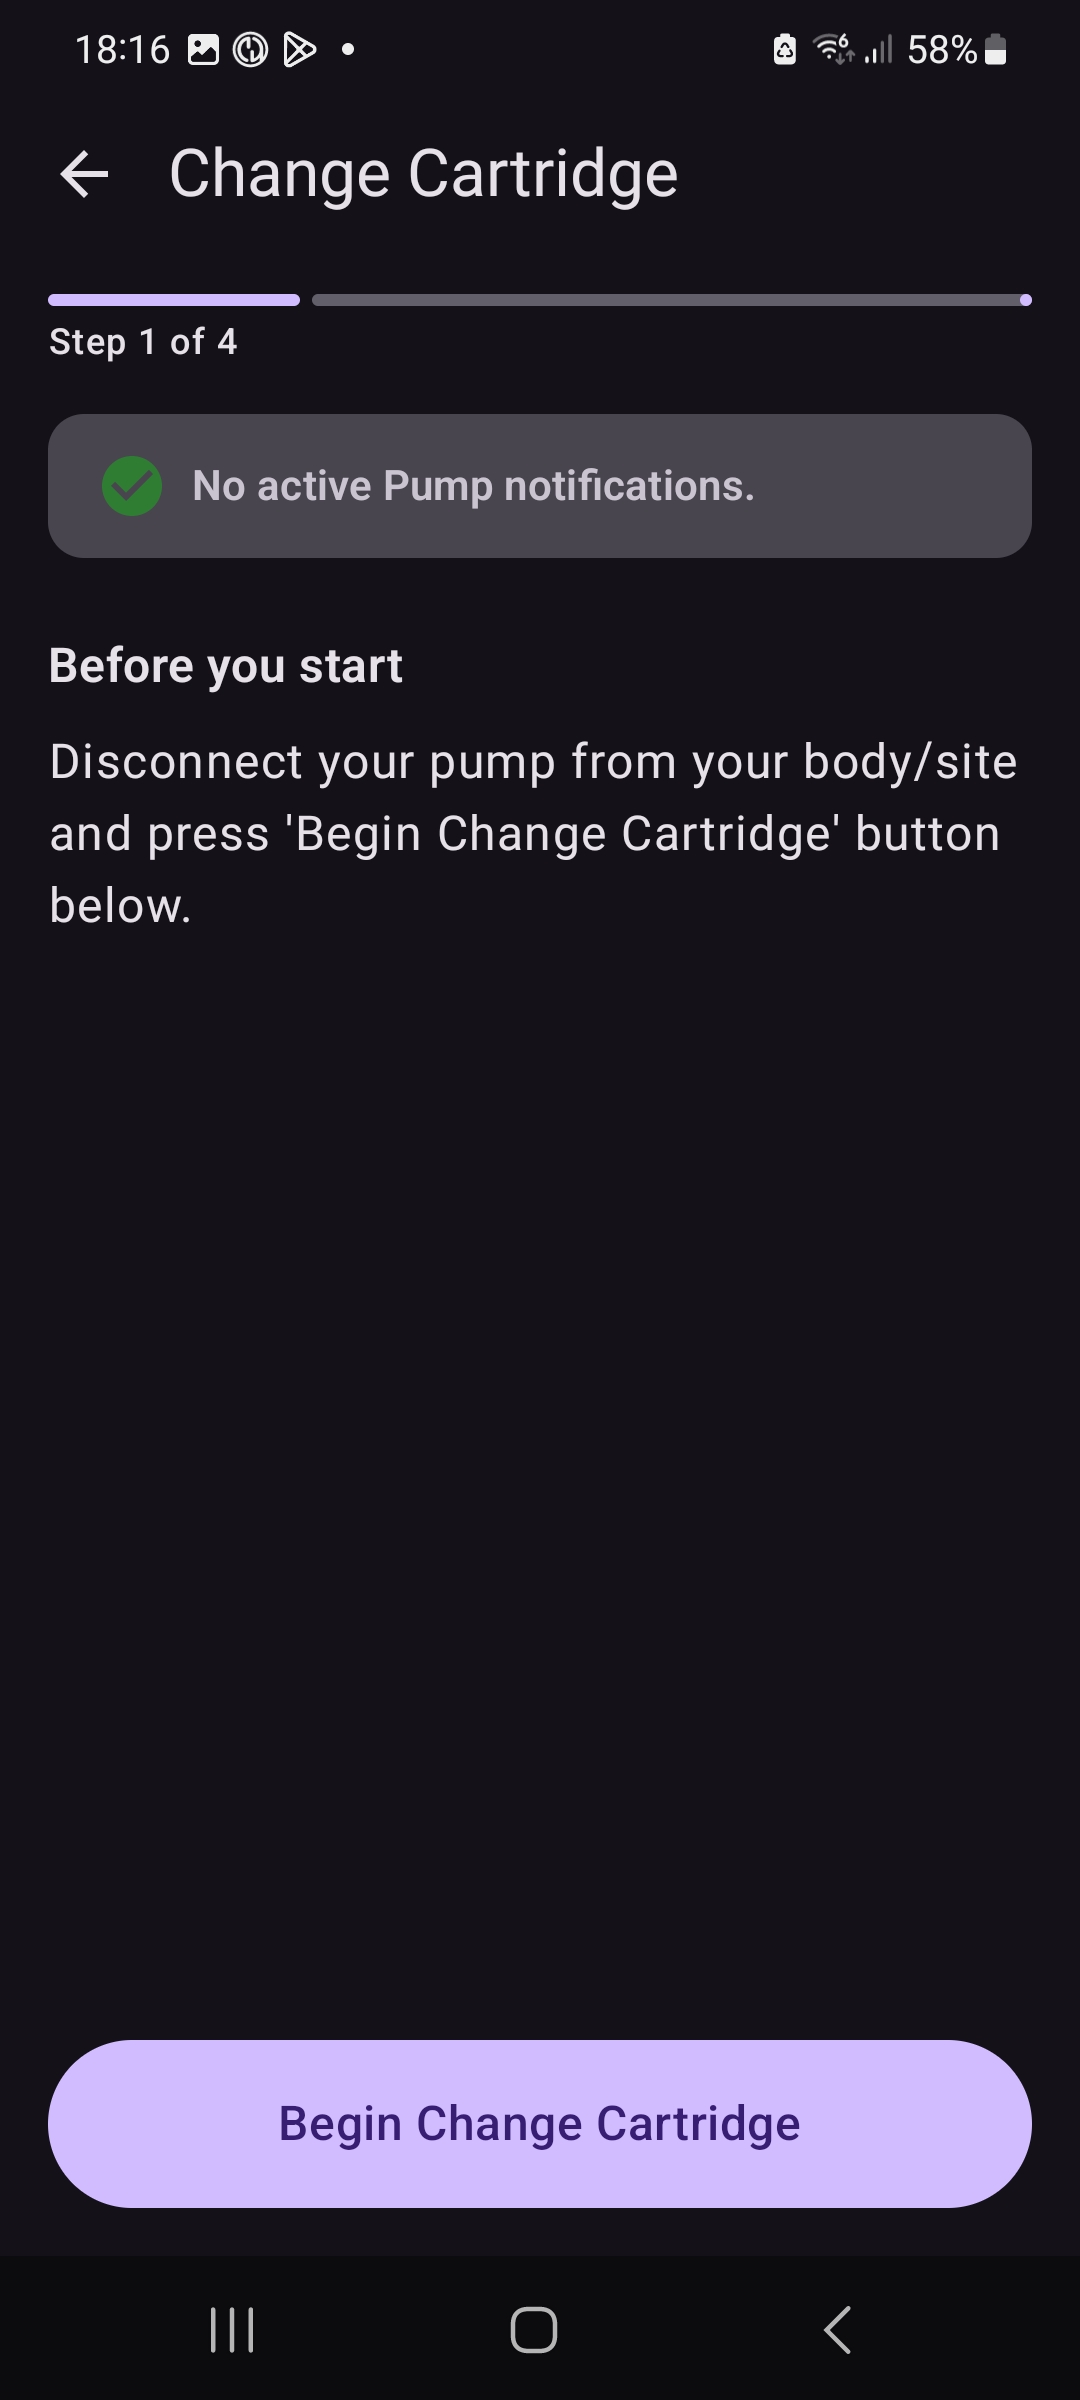
Select "Change Cartridge", then "Begin Change Cartridge" on the dialogue popup
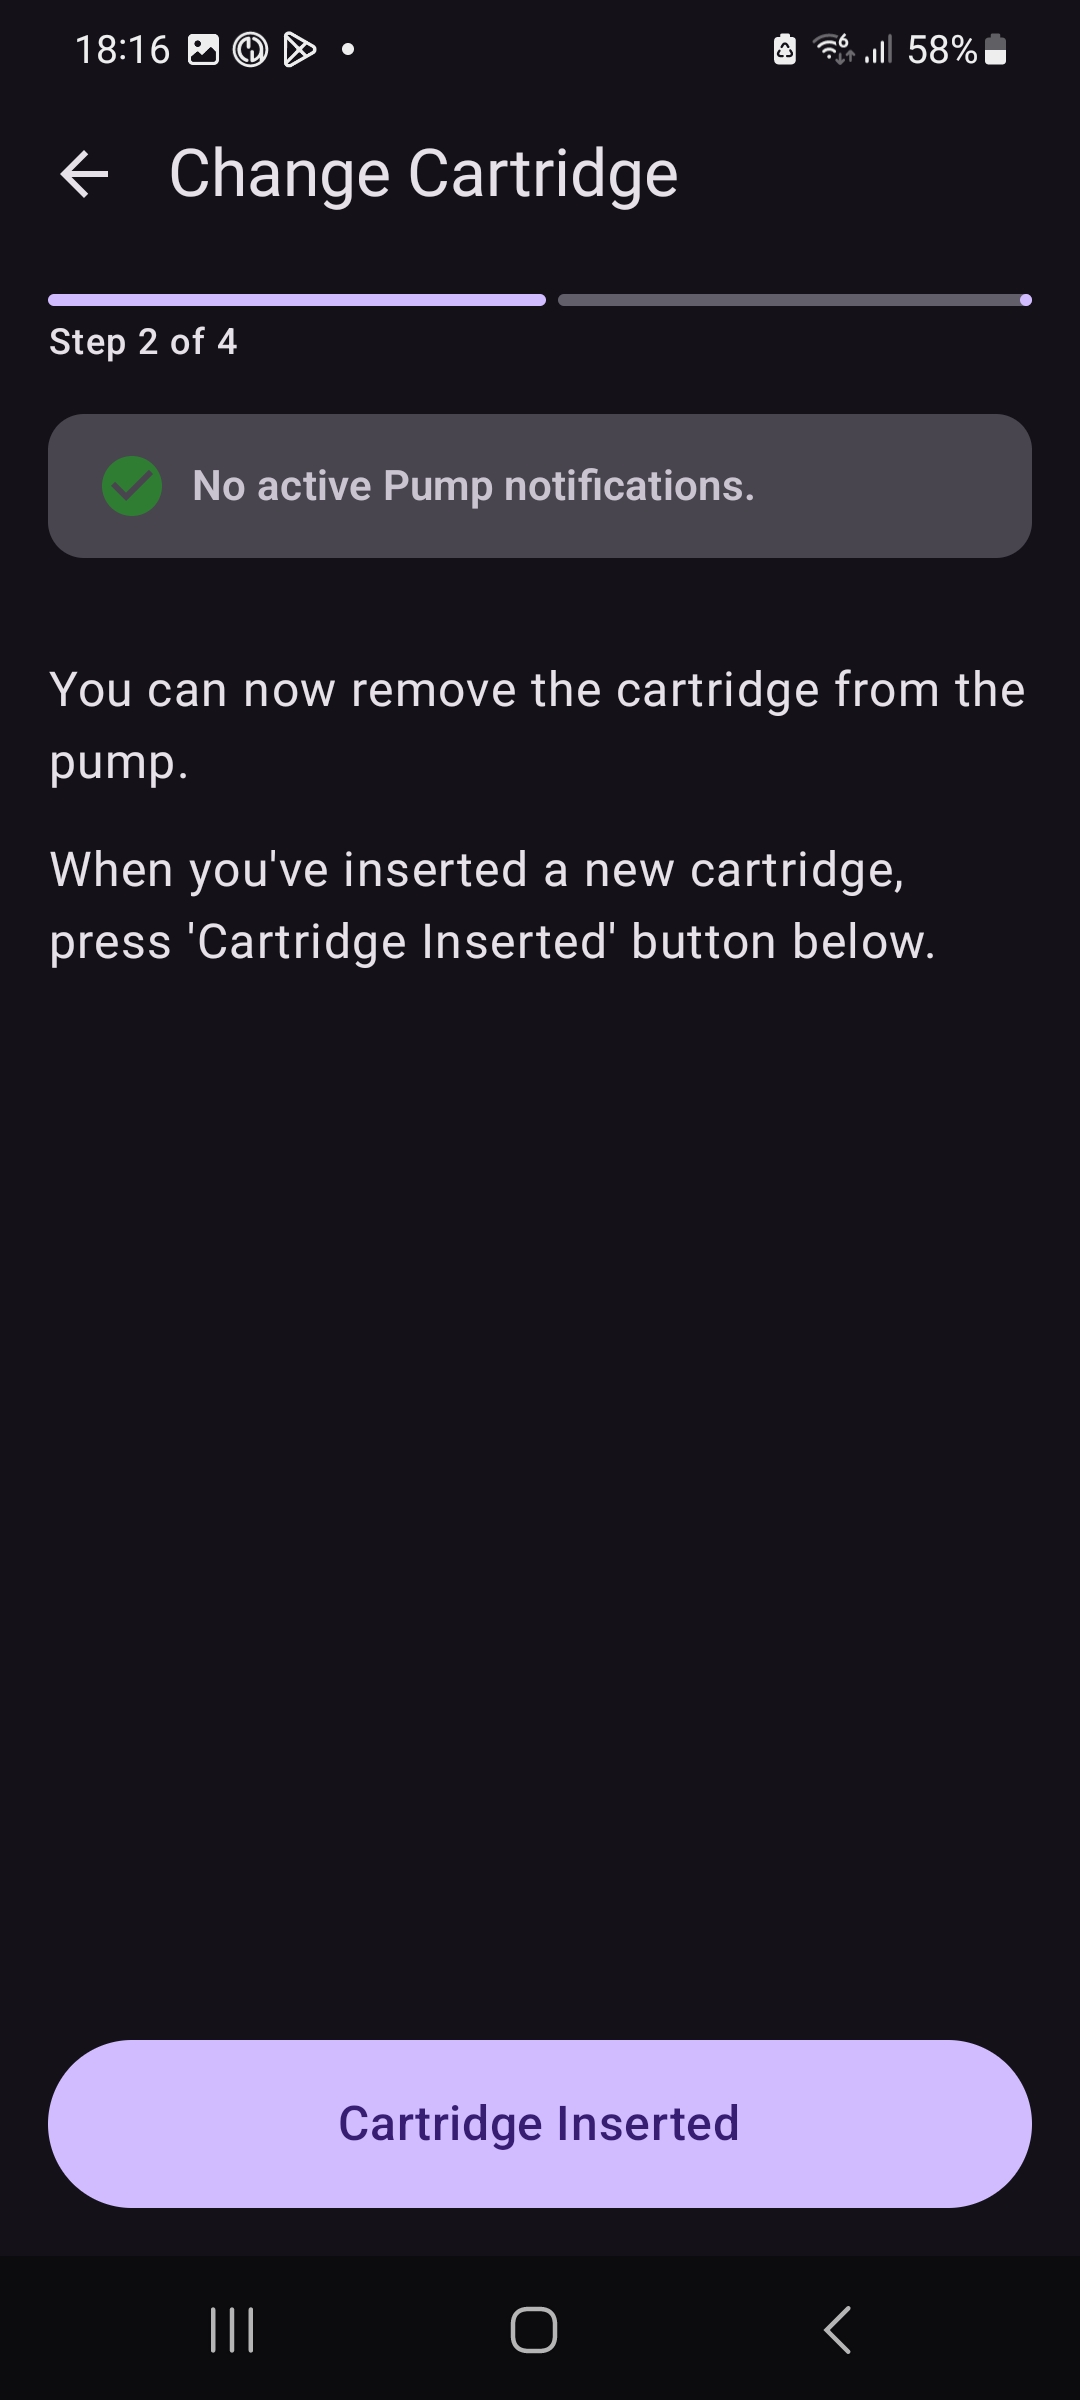
The cartridge on the pump will unlock, and you can remove the old and insert the new cartridge
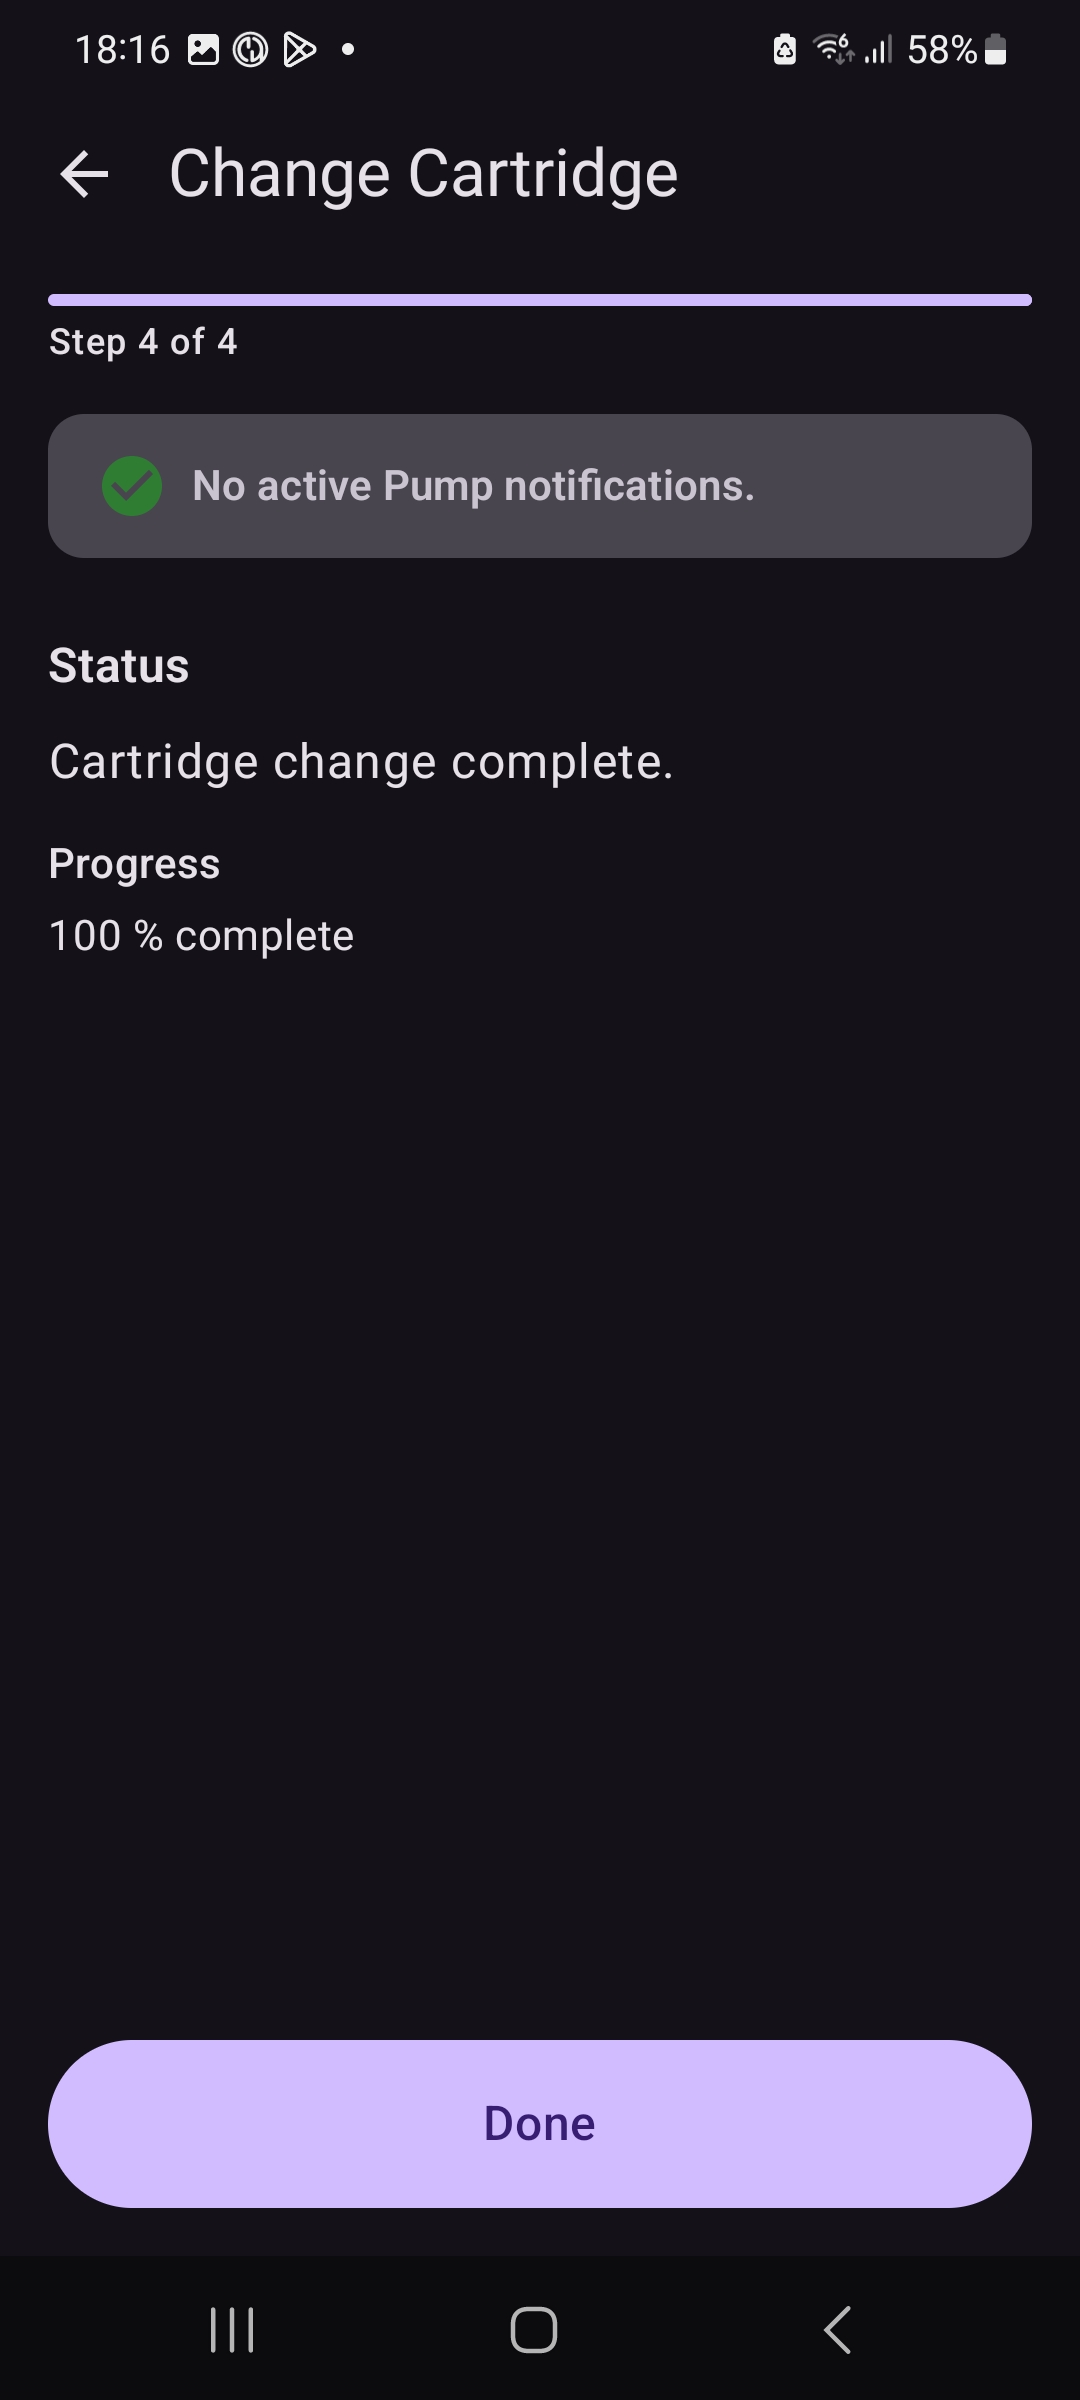
Once inserted, you can now fill the tubing
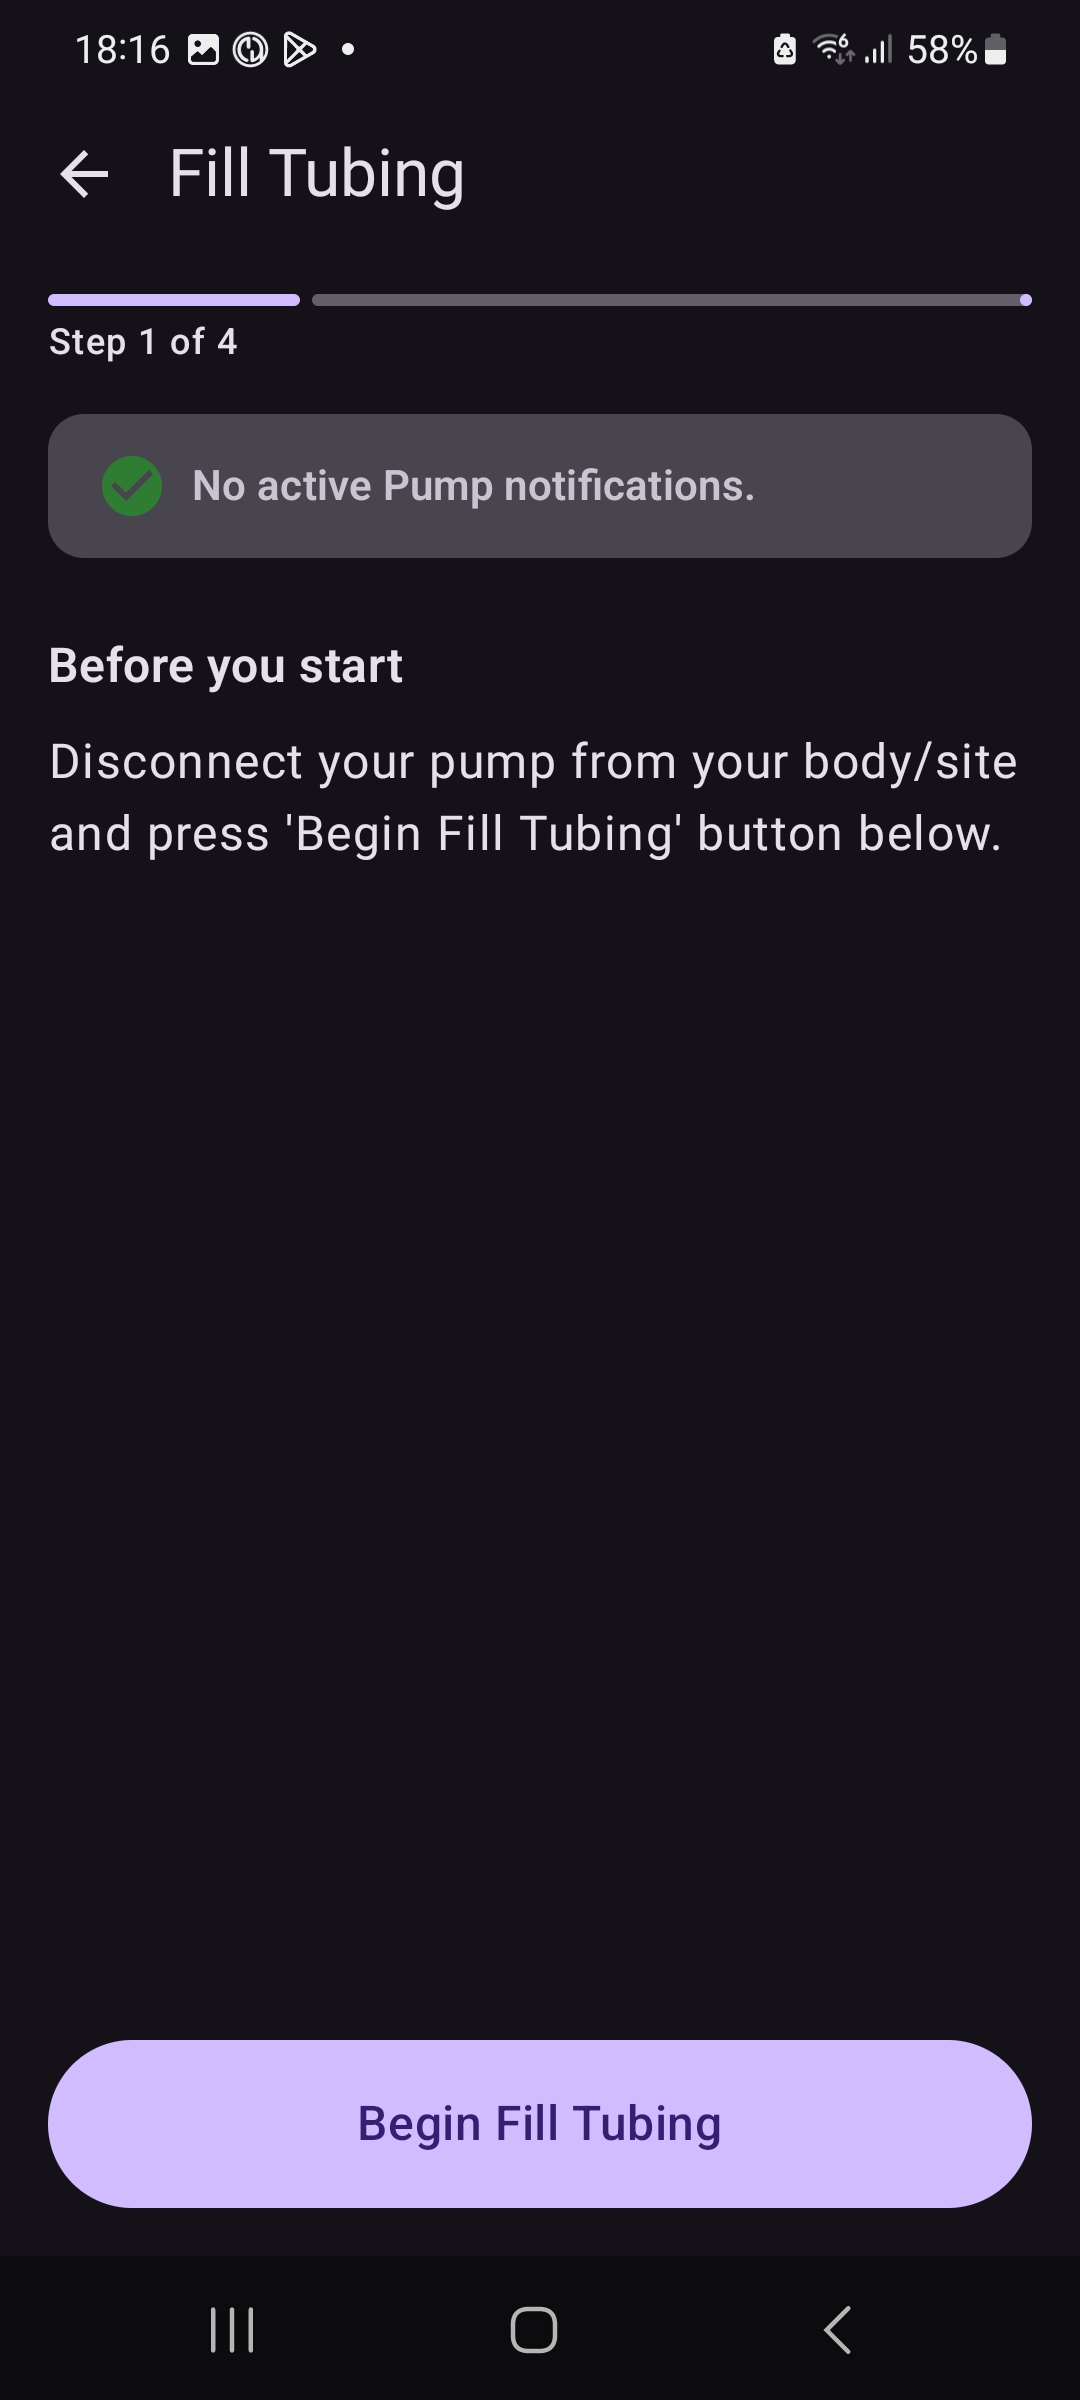
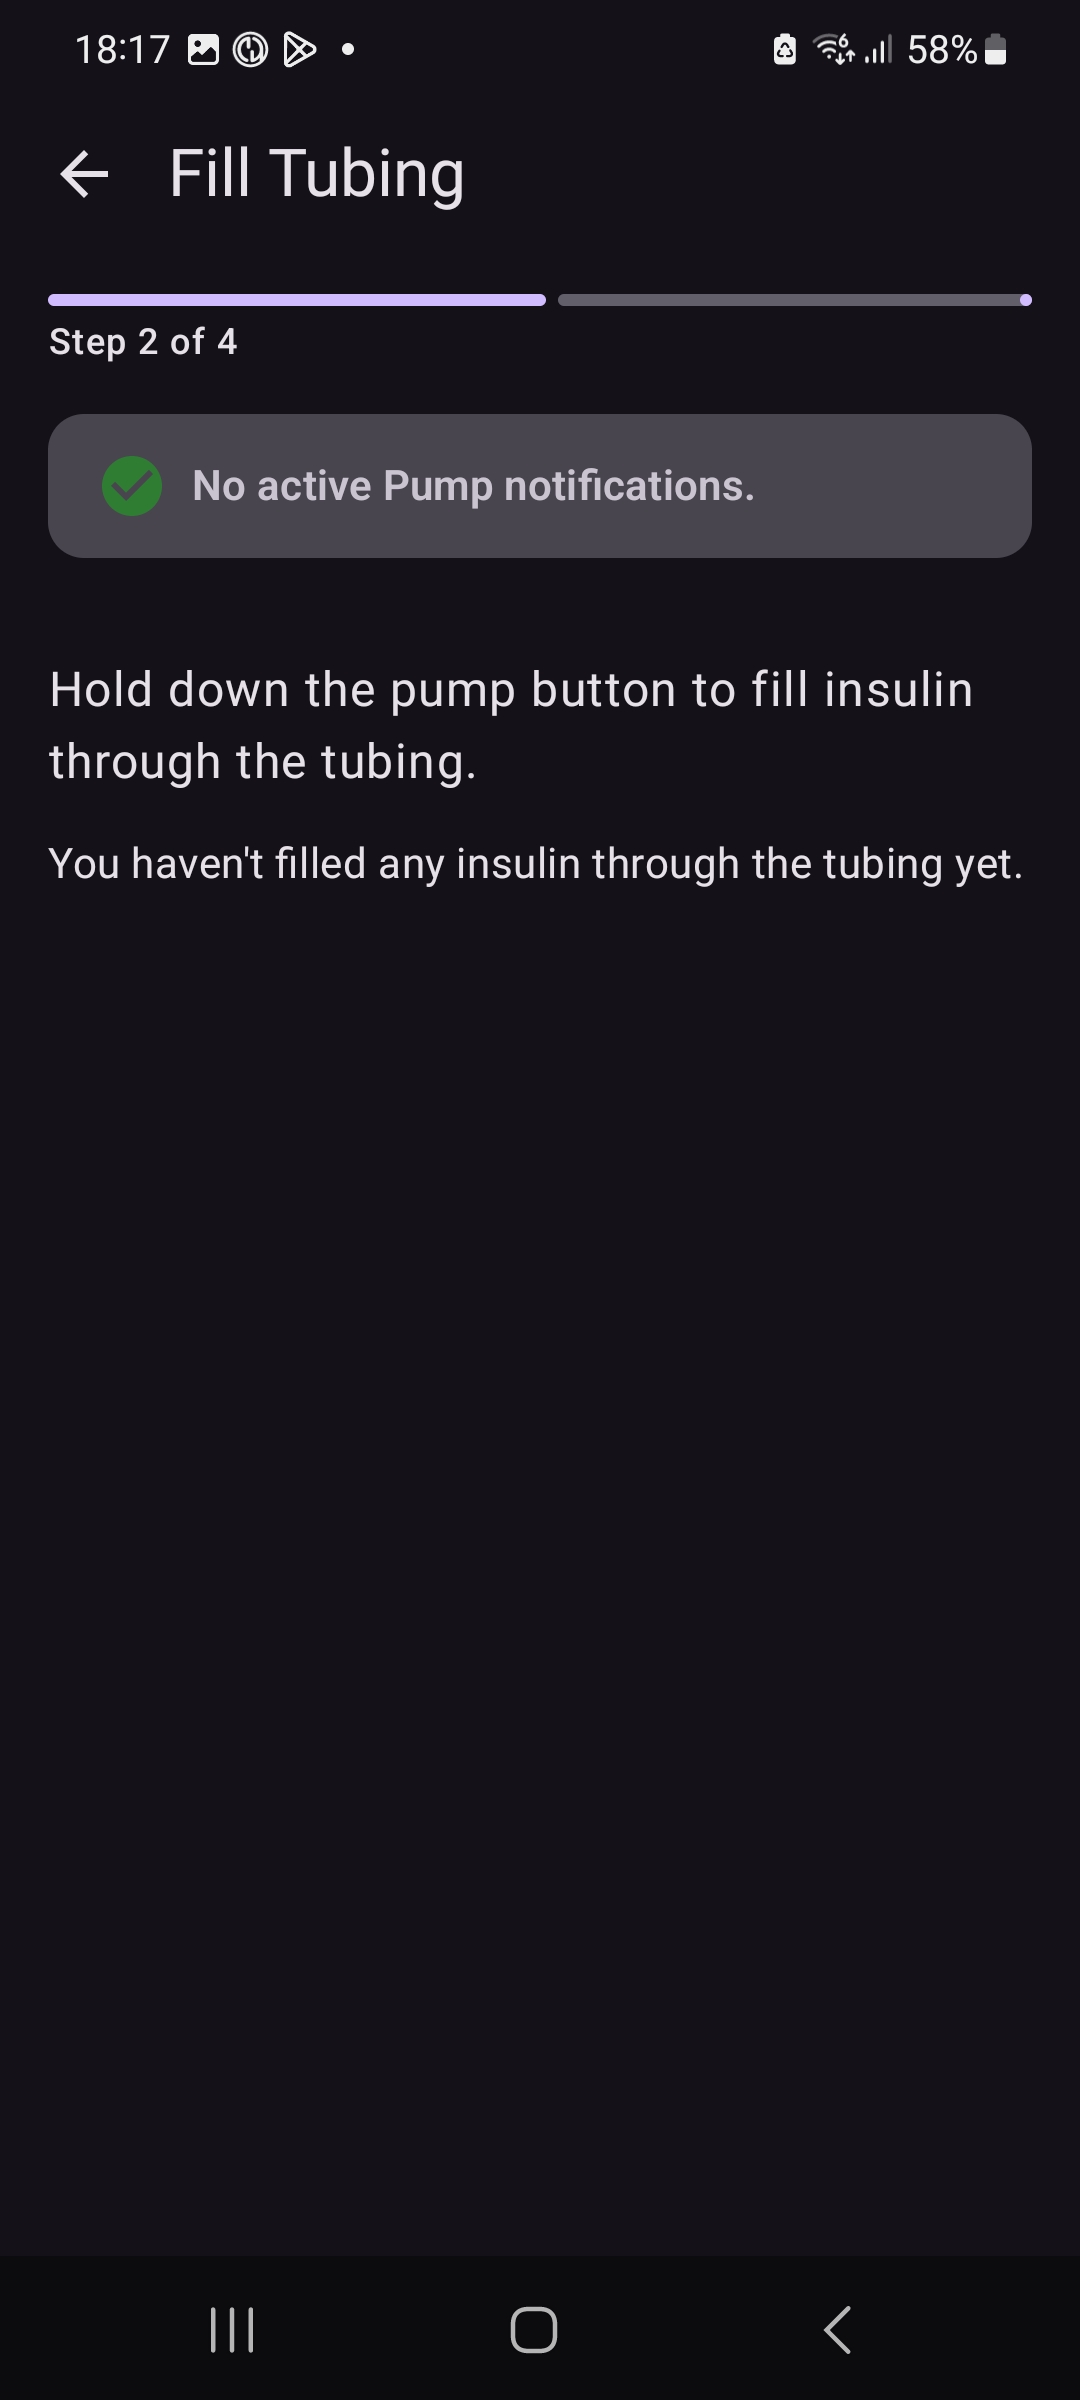
Fill Tubing
Select "Cartridge/Cannula Setup"
Select "Fill Tubing". Disconnect the pump site from your body/site before filling
When ready to fill, select "Begin Fill Tubing" on the dialog popup
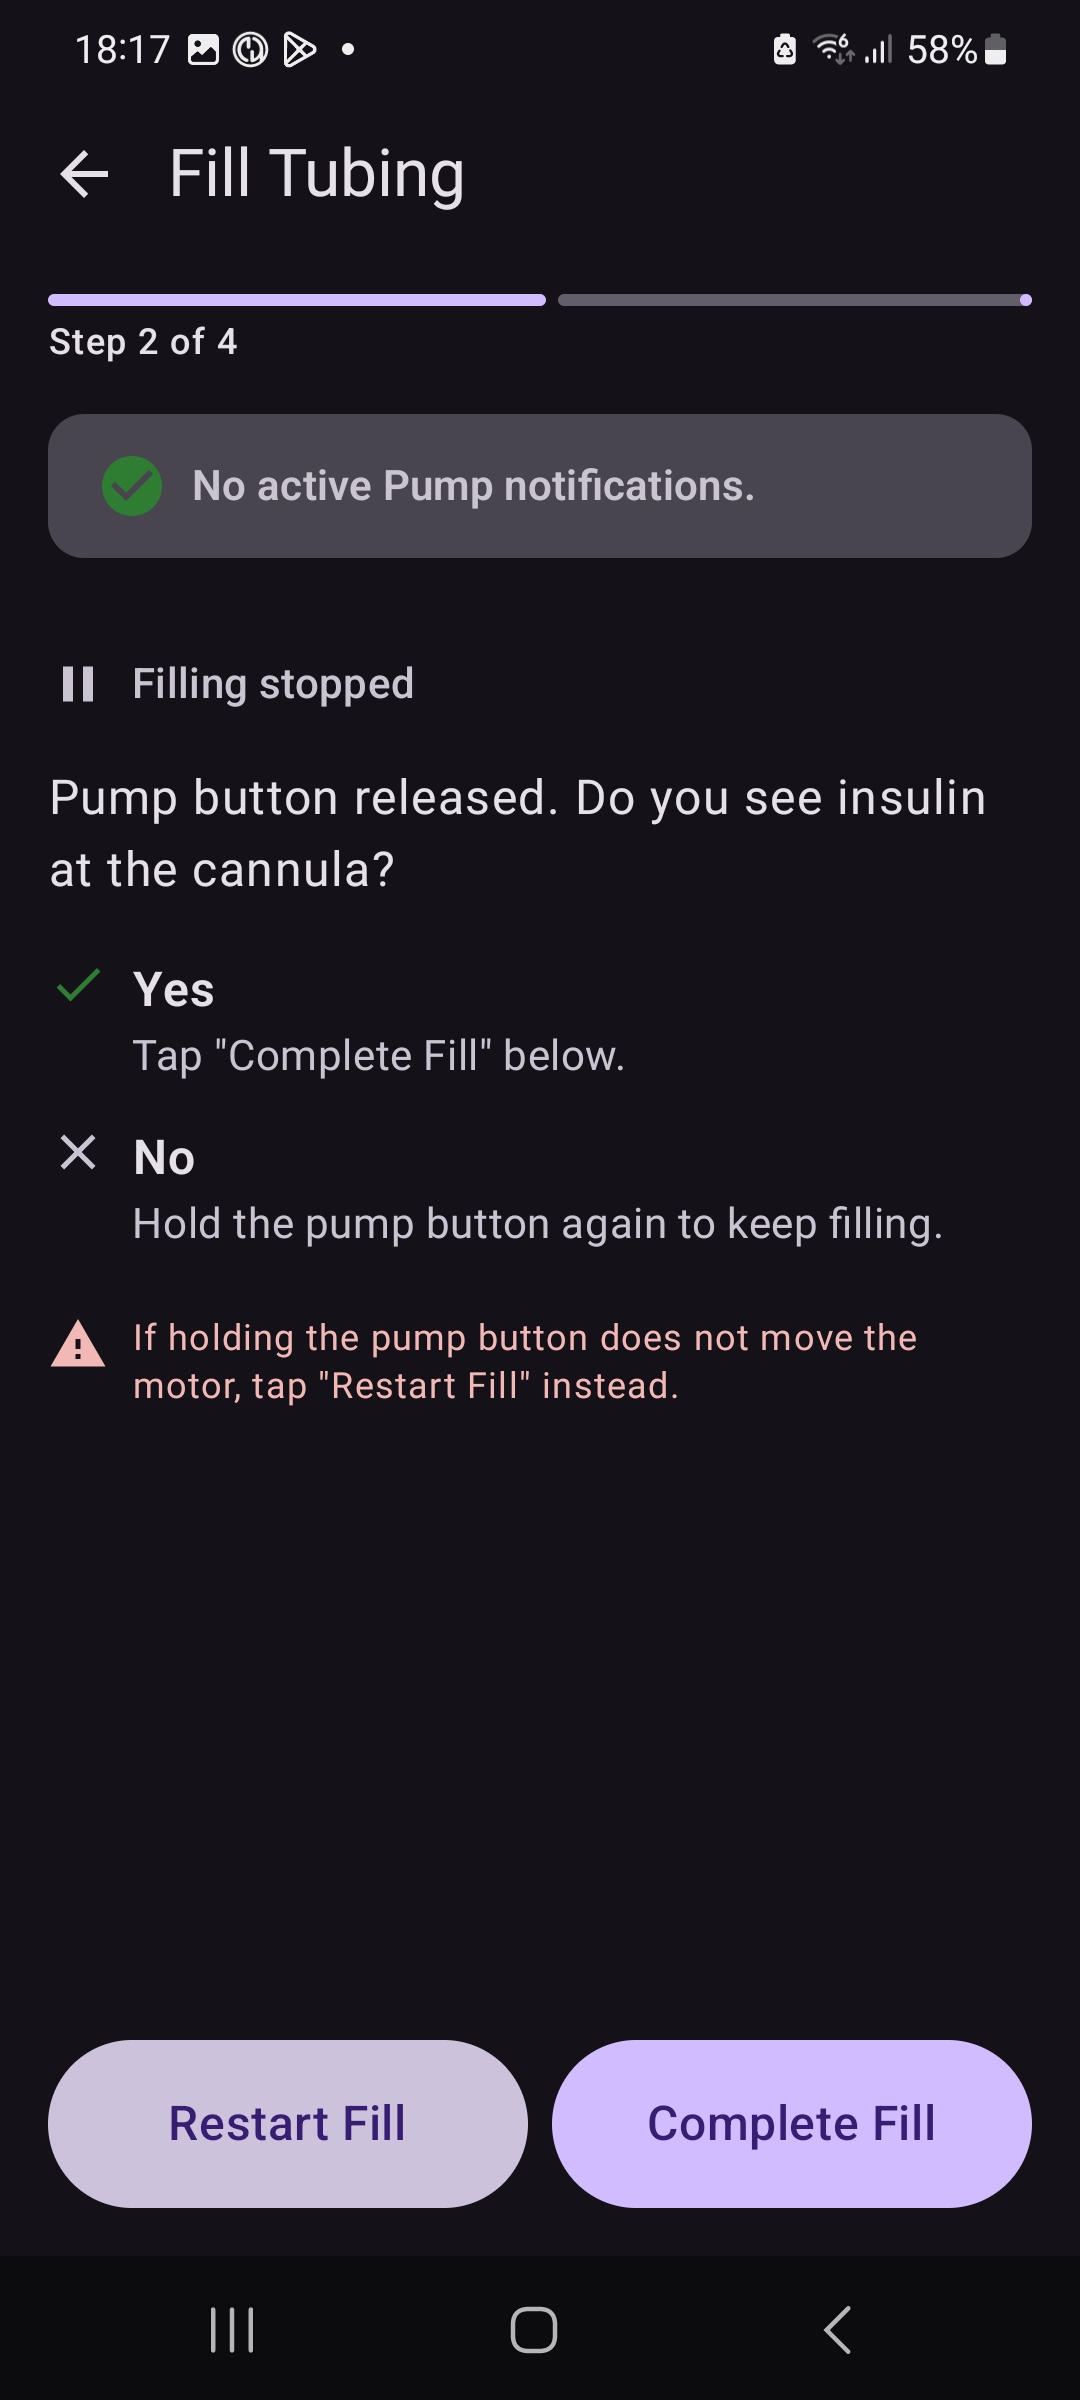
On your pump, hold down the pump button until insulin comes of the tubing
When done, a new popup will prompt you to continue. Select "Complete Fill" when done
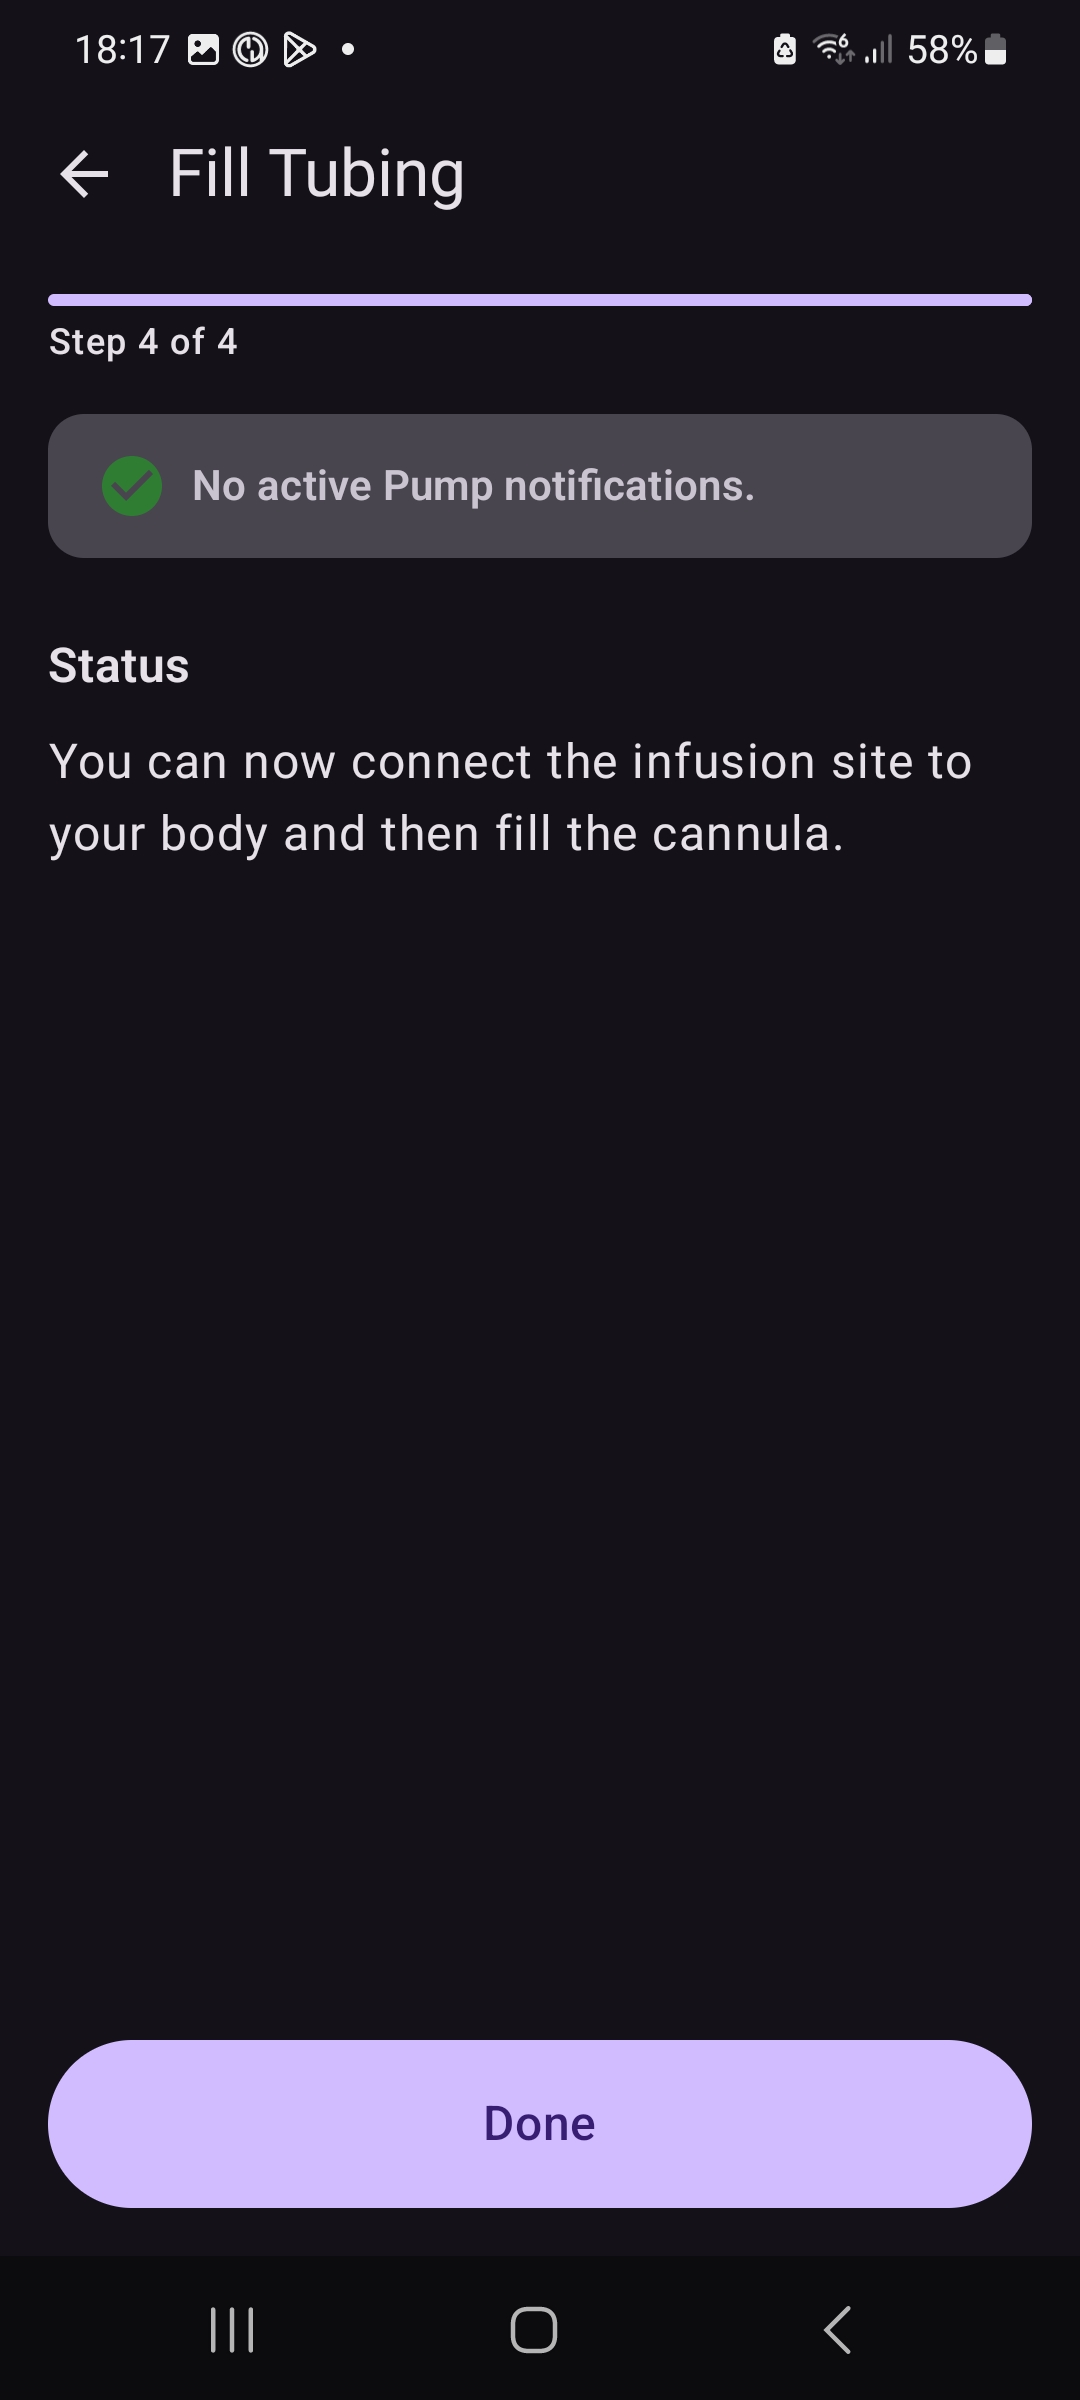
The pump will finish up and you can now select "Done"
Fill Cannula
Select "Cartridge/Cannula Setup"
Select "Fill Cannula"
Enter the amount of units and press "Fill Cannula"
Site Reminder
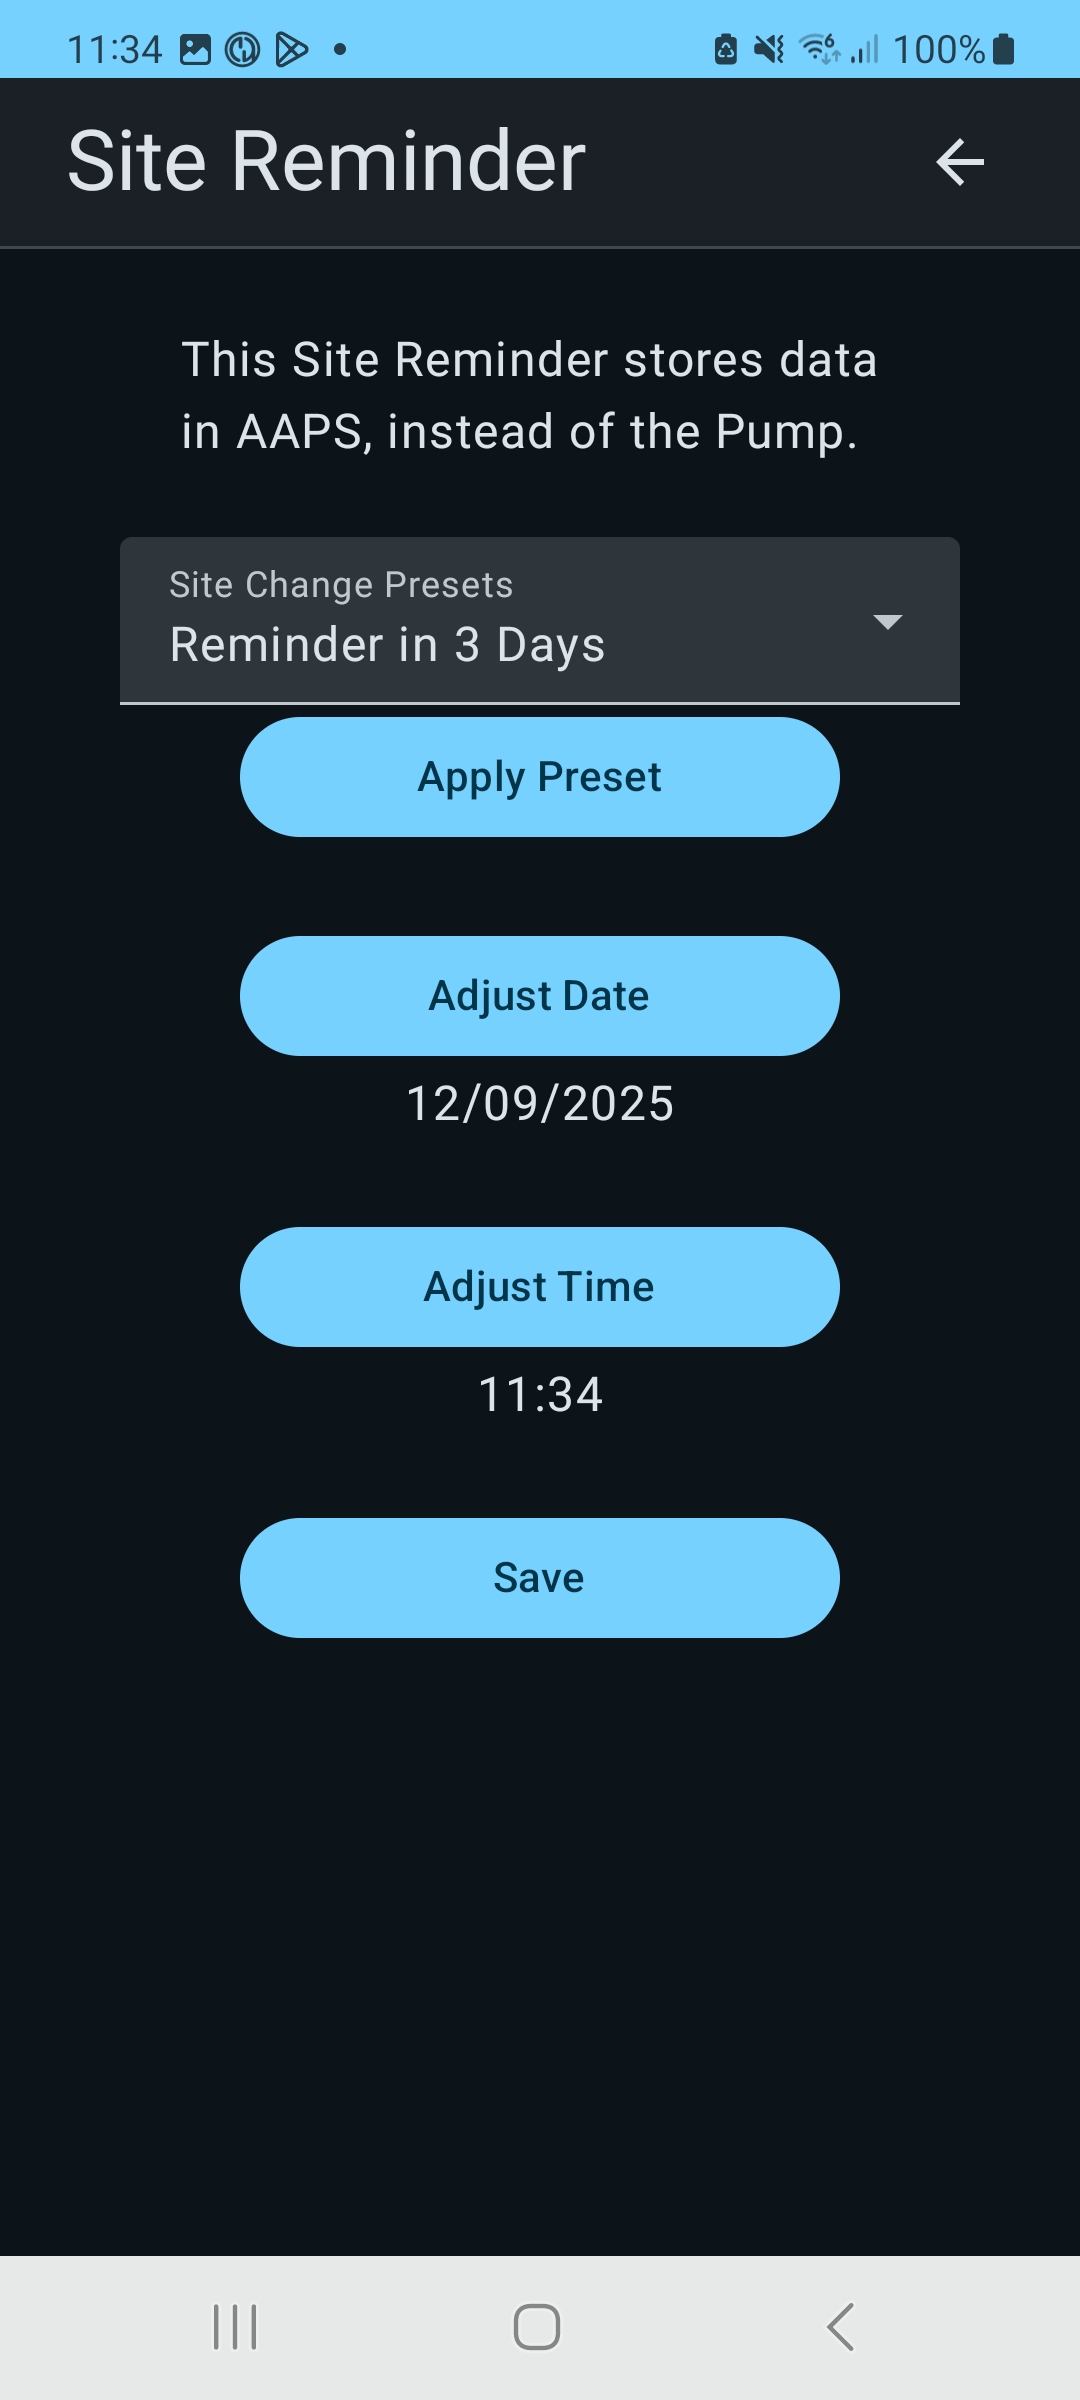
Site reminders are not tied to Pump's. This are internal AAPS Site reminders
You can select one of presets and then press "Apply Preset" and dates will change
If your date/time color is blue this means that you need to press "Save" or else your changes will be lost.
You can also change date/time manually or you can use presets and manual together (just apply preset, and then change date/time).
Currently implemented functionalities
Get/Set Settings (disable IQControl, max bolus, max basal)
Get Battery Status
Get Insulin Level
Get/Set Basal Profile (Note: Mobi supports only 16 time segments, so you have to model your Basal Profile accordingly)
Get/Set/Cancel TBR (this enables Looping with oref0)
Get/Set Bolus (this enables Looping with oref1)
TZ and Daylightsaving time change (not tested)
Qualifying Events: On certain actions, pump sends so called QEs. You can see events in Data -> Events.
Alerts and Alarms: We read this on every pump status update (every 5 minutes) and display it in Data -> Notifications.
Pairing in AAPS or using shared connection with pumpX2
Troubleshooting
I forgot to charge up my pump and now it has powered down
No panic. Just charge the pump for about 15 minutes or so and then bring pump out of sleep mode. Start AAPS and pump should be running. You will have to acknowledge a notification that the pump has shut down, change the reservoir, and then "Start Insulin". Any notifications will need to be cleared before changing cartridge, filling tubing/cannula, or resuming insulin.
I am receiving a Malfunction code
The PumpX2 library currently displays some malfunction codes which the official Tandem Mobi app does not display as malfunctions. The official app appears to allow-list specific malfunction codes reported by the pump as being "real" malfunctions necessitating you to call Tandem for support. Some malfunctions may disappear when acknowledging related alarms which appear in the Notifications view. As a result, please do not contact Tandem about malfunction codes which display in AndroidAPS. If you suspect the pump hardware might be faulty, please switch back to the official Tandem Mobi iOS app (or Android app when it is released) to confirm whether the malfunction code is real or not.
This section will be extended when we find areas that need troubleshooting.
Cartridge setup
Change Cart (step 3 is missing picture)
Fill Tubing (step 3 is missing picture, automatically proceeds)
Starting and Stoping Delivery
Copyright (c) 2025-26 - AAPS, developed by AndyRozman (AAPS) and JWoglom (pumpX2 library and little AAPS)